
Knowledge Base Management
The knowledge base supports uploading local files or creating and editing online.
Sidebar Resource Actions
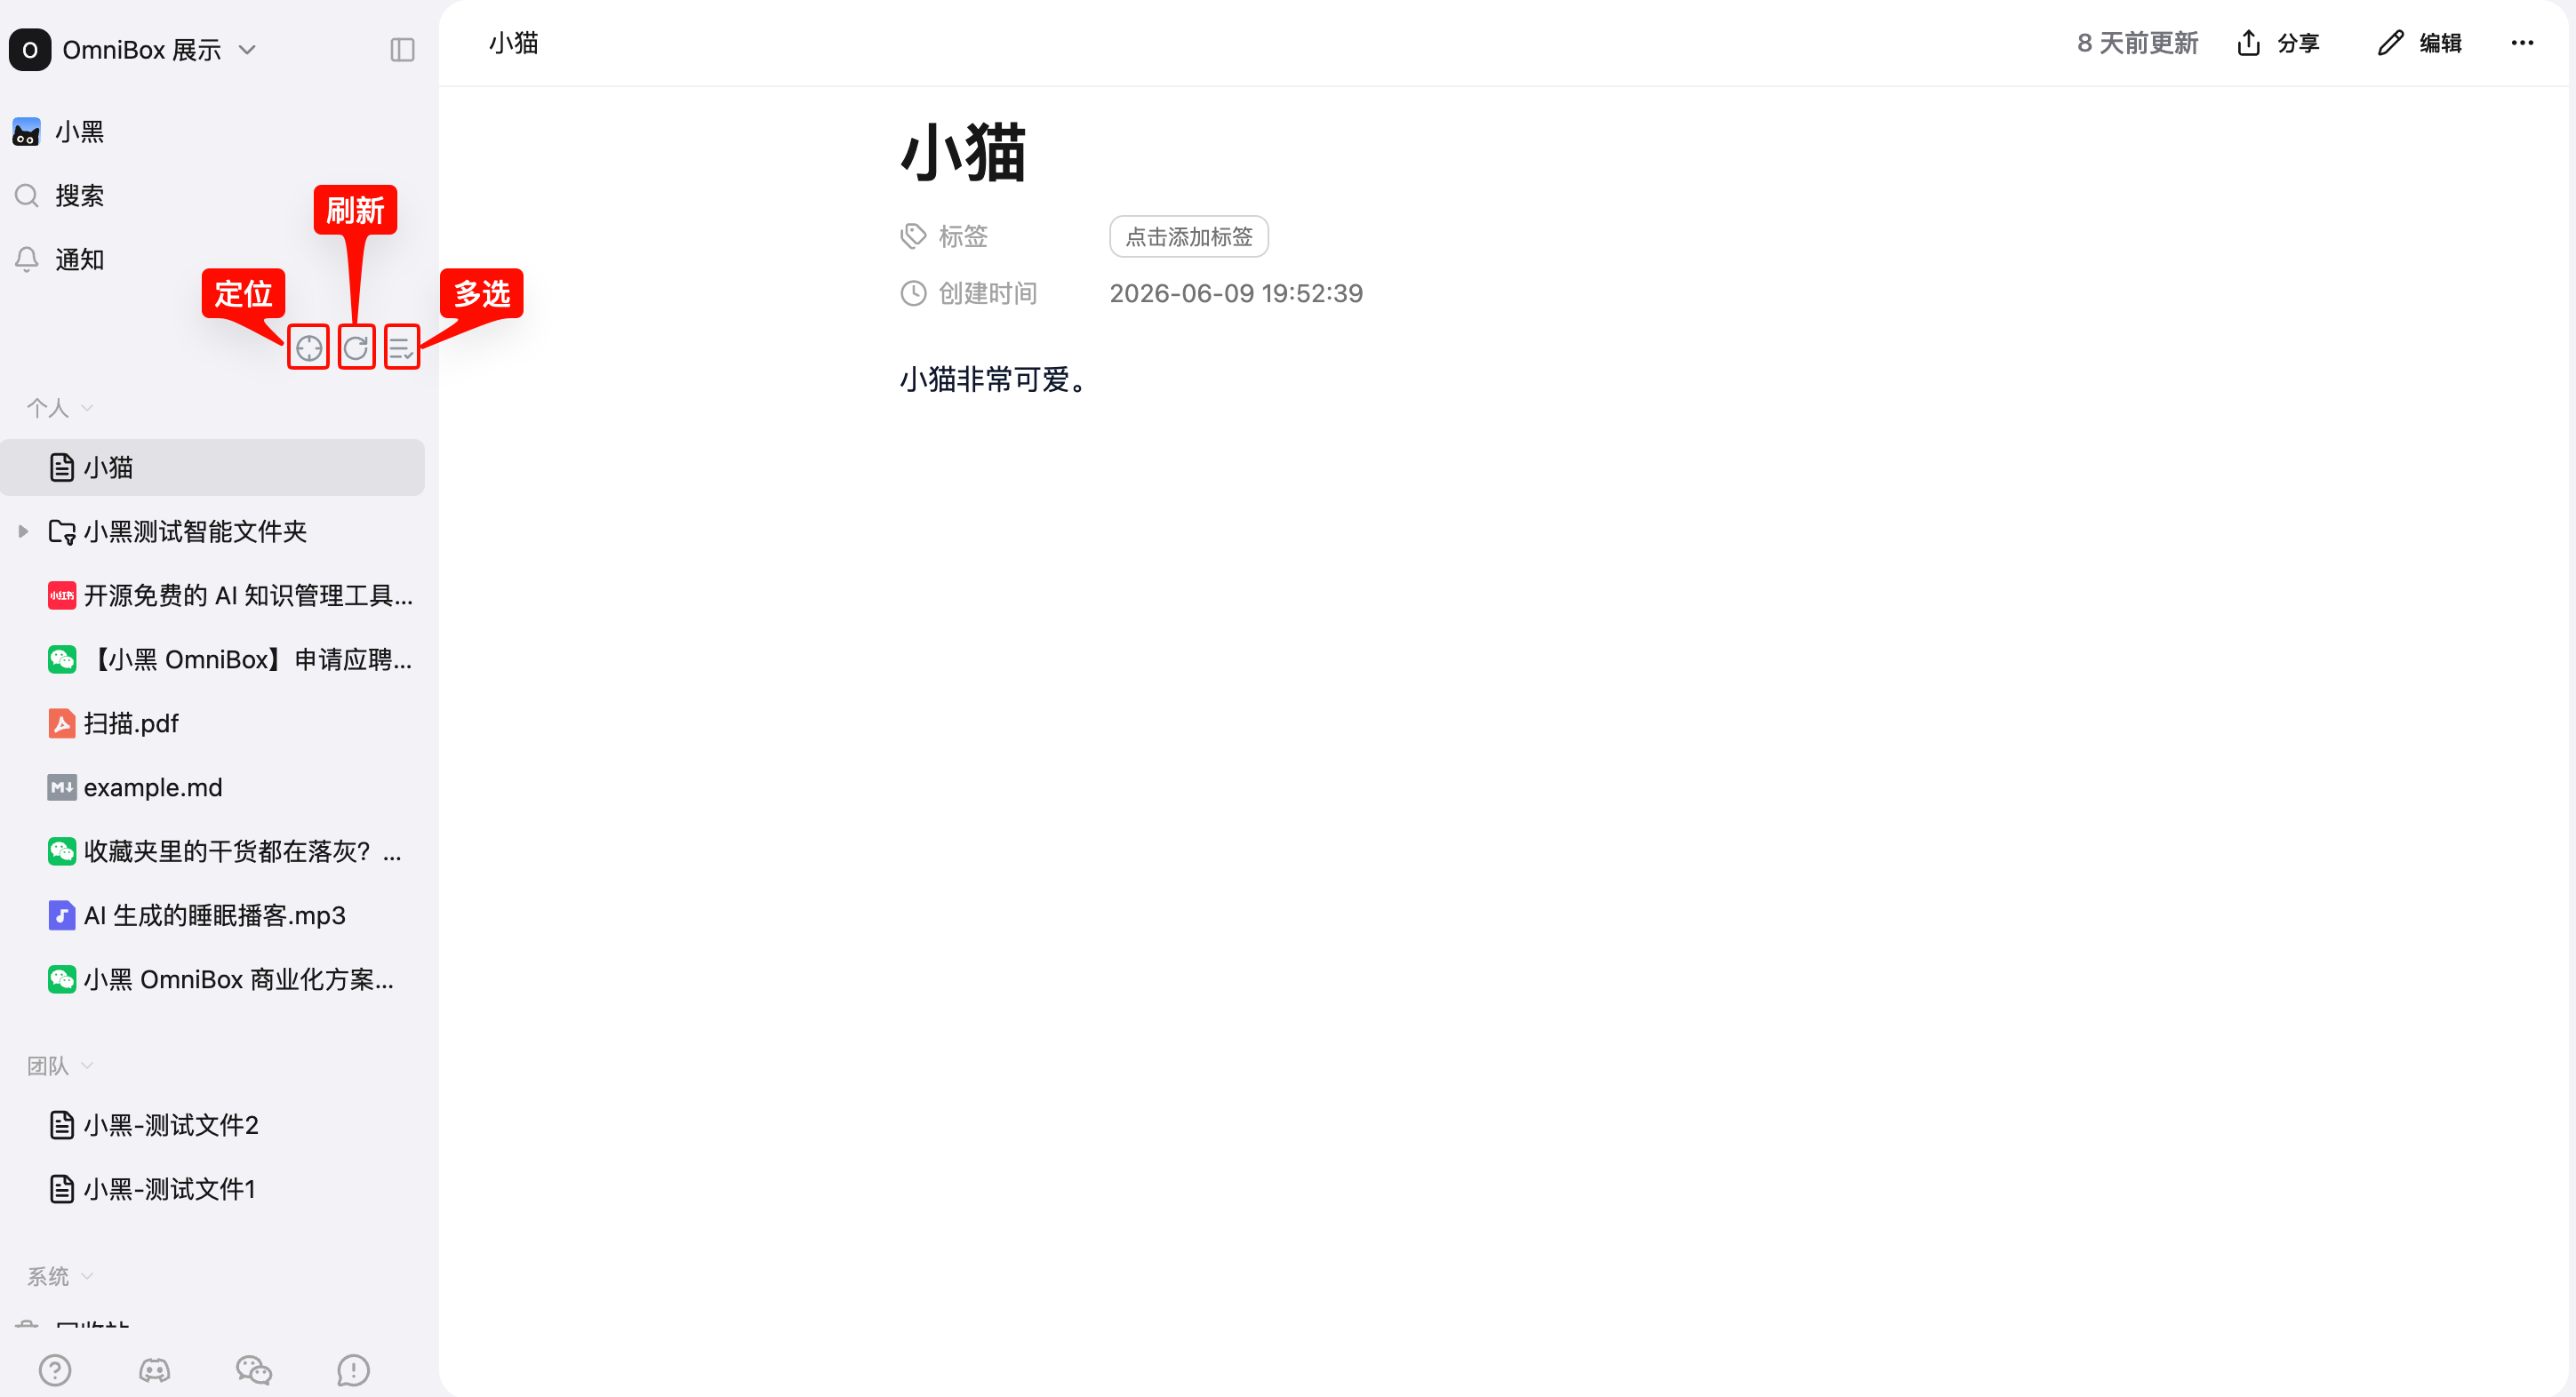
In the left resource list on the web app, you can quickly locate, refresh, and organize resources in the current namespace.
- Click
Locateat the top to find the currently opened resource in the left resource list. OmniBox expands the path and jumps to the target resource. If no resource is currently open, it showsNo resource to locate. - Click
Refreshat the top to reload the resource list. Use it after uploading, moving, or changing resources on another device or through an external tool. - Click
Multi-selectat the top to enter Batch Management mode and organize multiple files, folders, or Smart Folders at once. - Resource lists support sorting so you can adjust how resources are displayed.
- Long titles in deeply nested resources are optimized to reduce browsing interruptions.
The Private and Team sections in the left resource list also support quick actions:
- Click the arrow next to a section title to collapse or expand that section.
- Hover over the
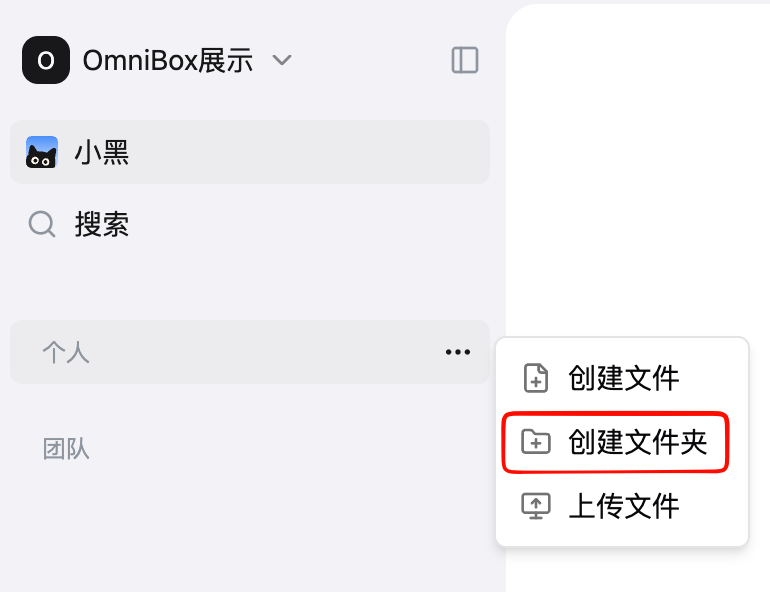
PrivateorTeamtitle and click the menu on the right toCreate File,Create Folder,Create Smart Folder, orUpload Fileinside that section.
Create Files/Folders
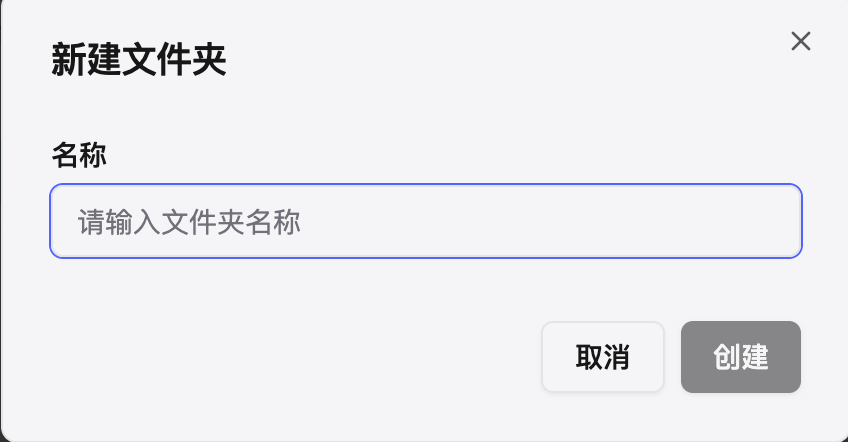
Create Folder
After clicking the Create Folder button in the menu, a popup will appear where you can name the folder.
Create File
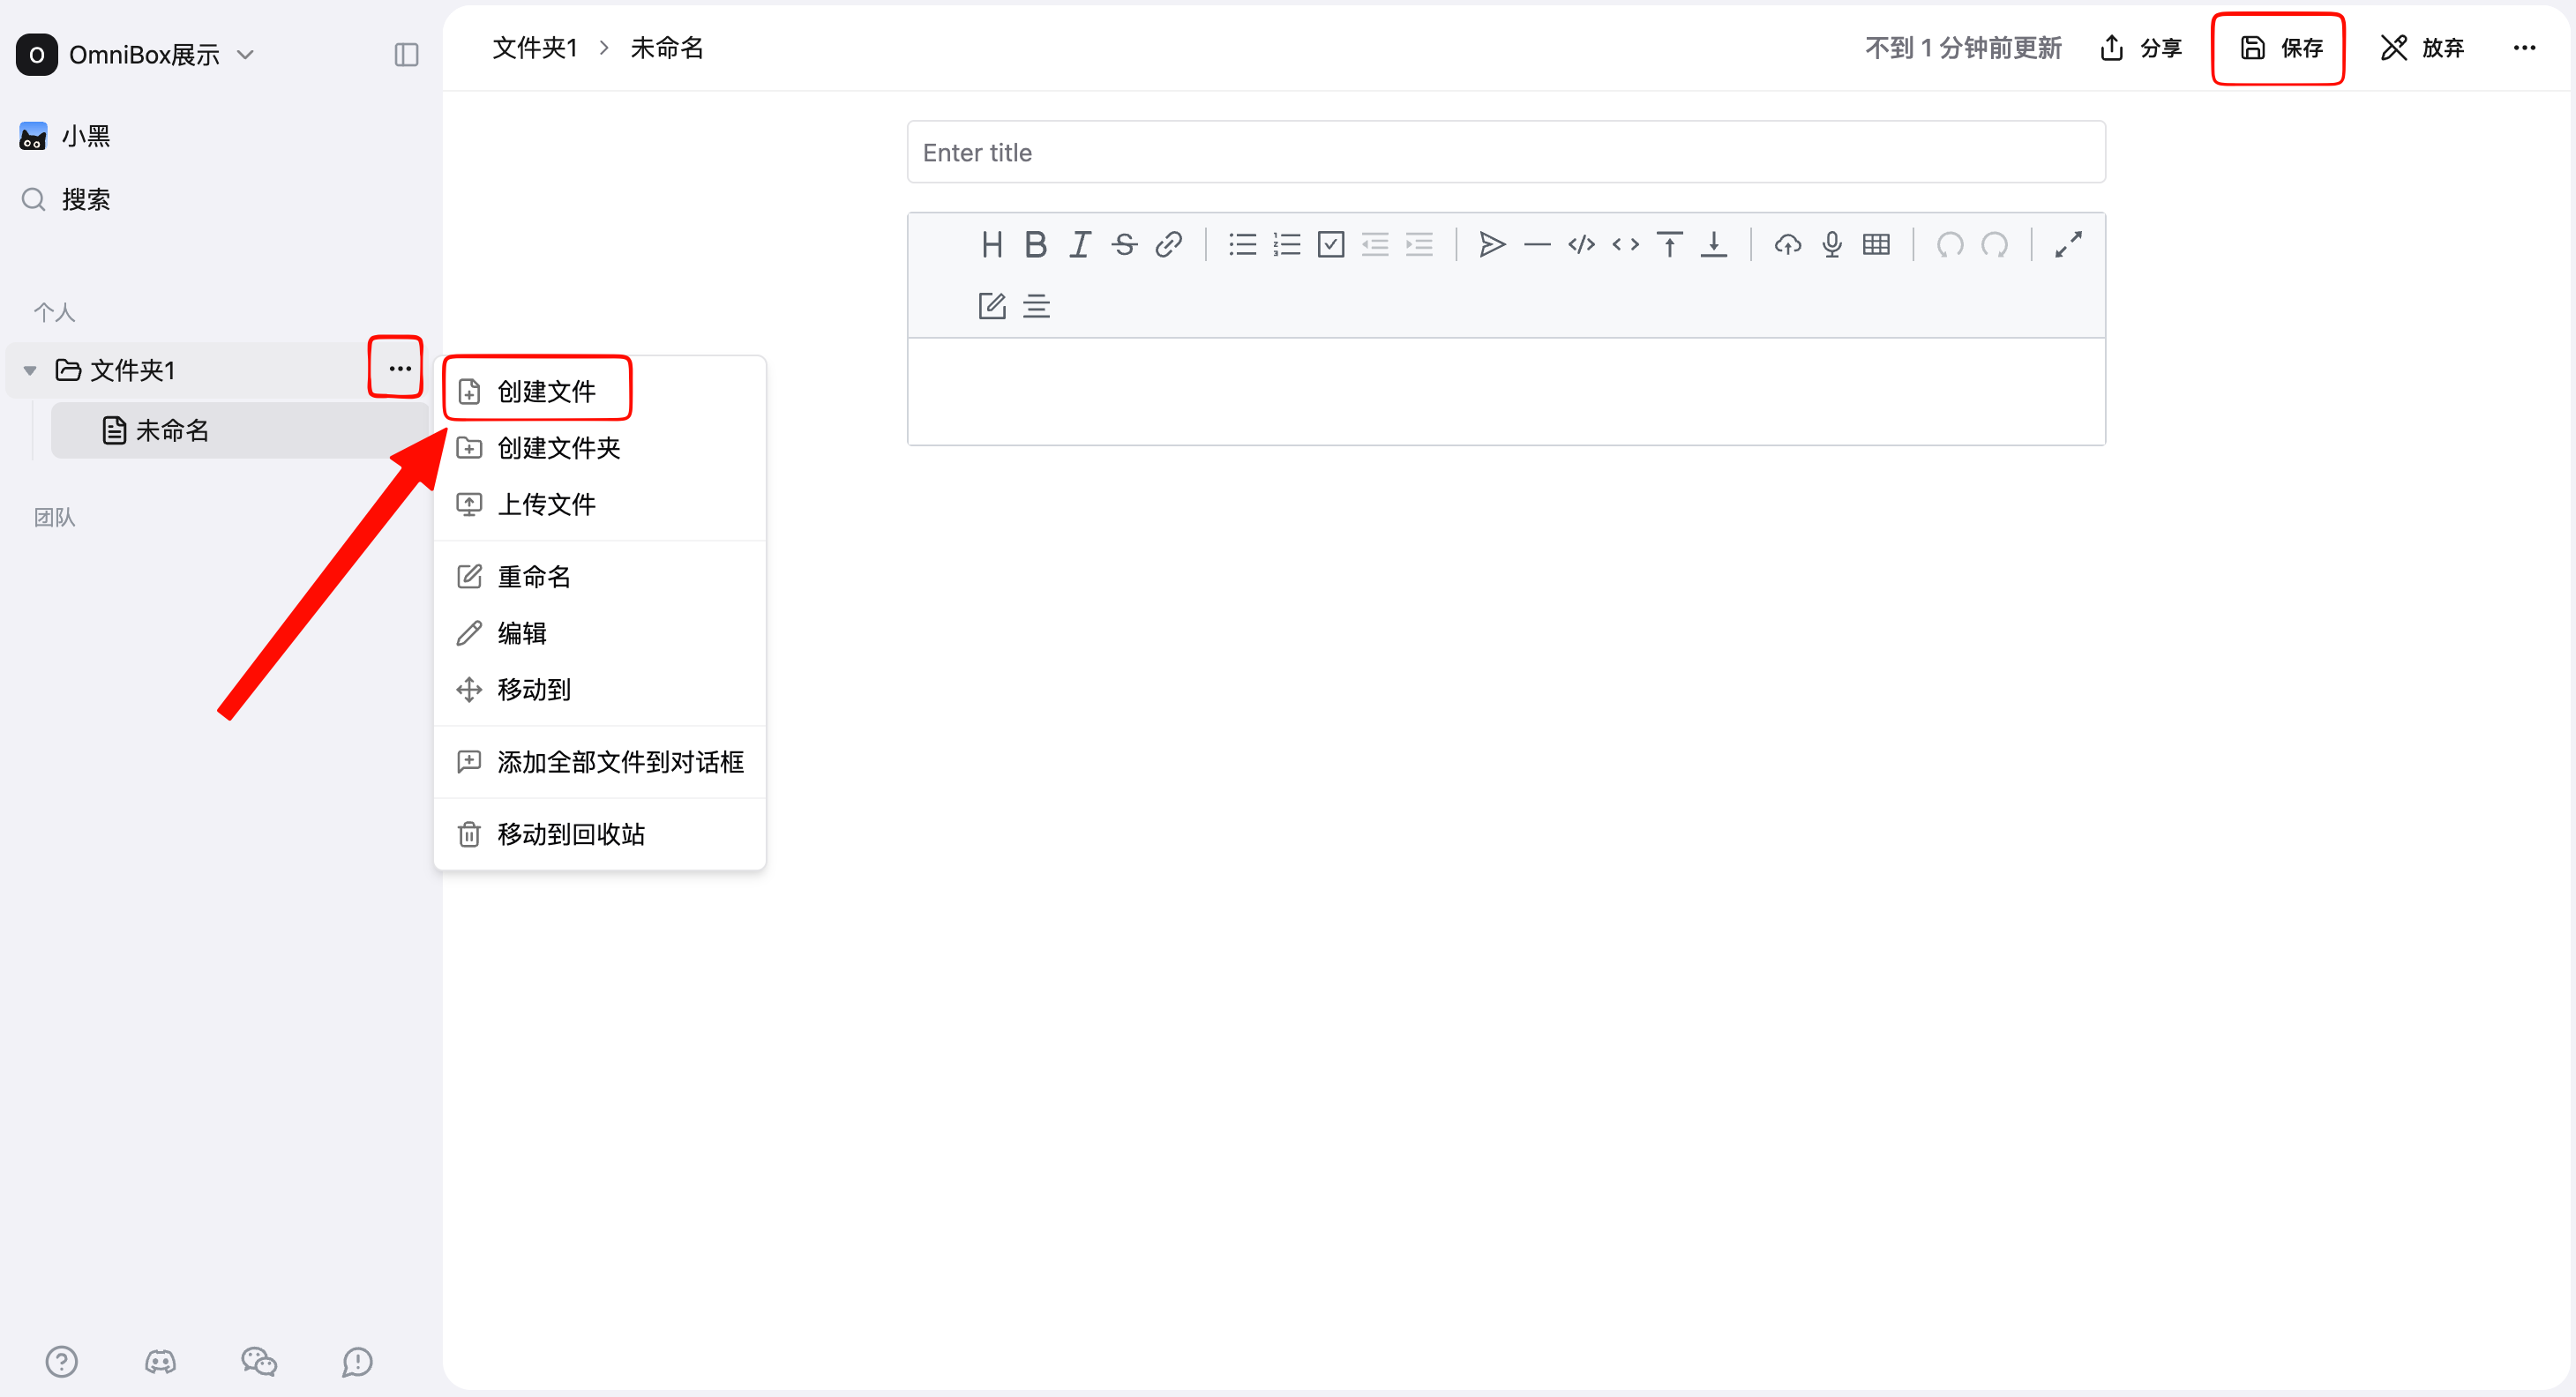
After clicking the Create File button in the menu, the system will open an edit page where you can edit content. This page requires manual saving.
Rename Files/Folders
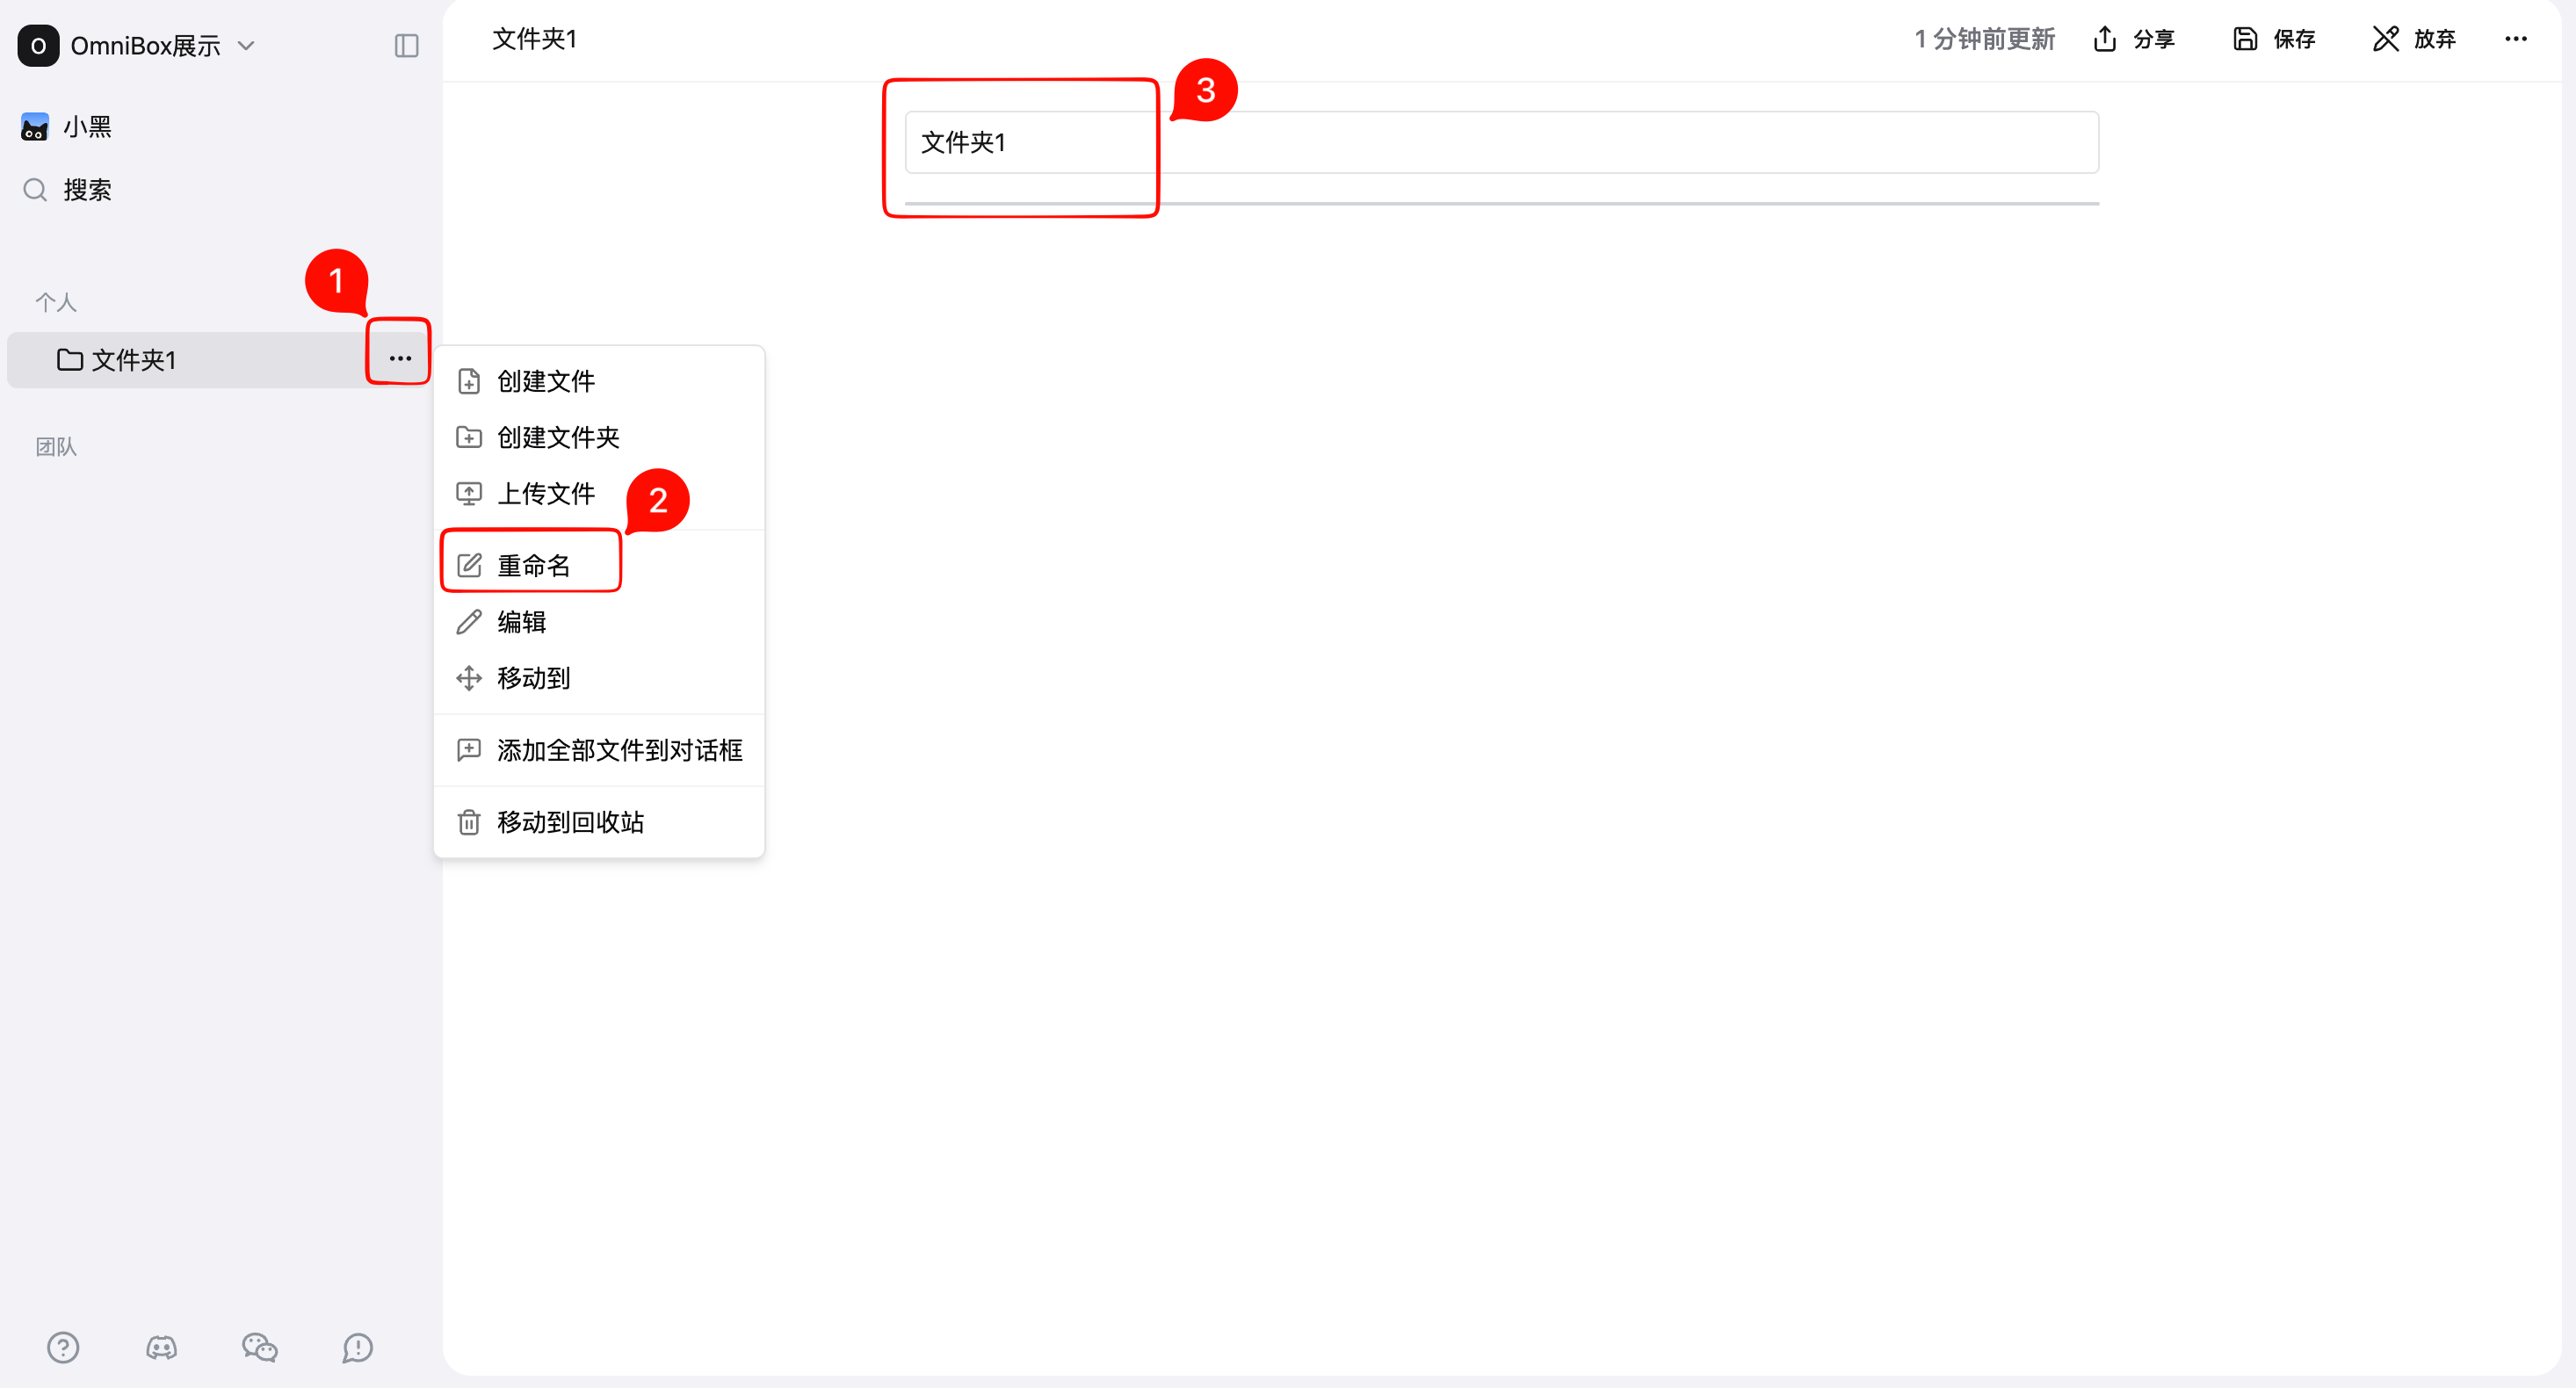
Click Rename in the menu or double-click the file name/folder name to modify the name.
Edit Files/Folders
- Click
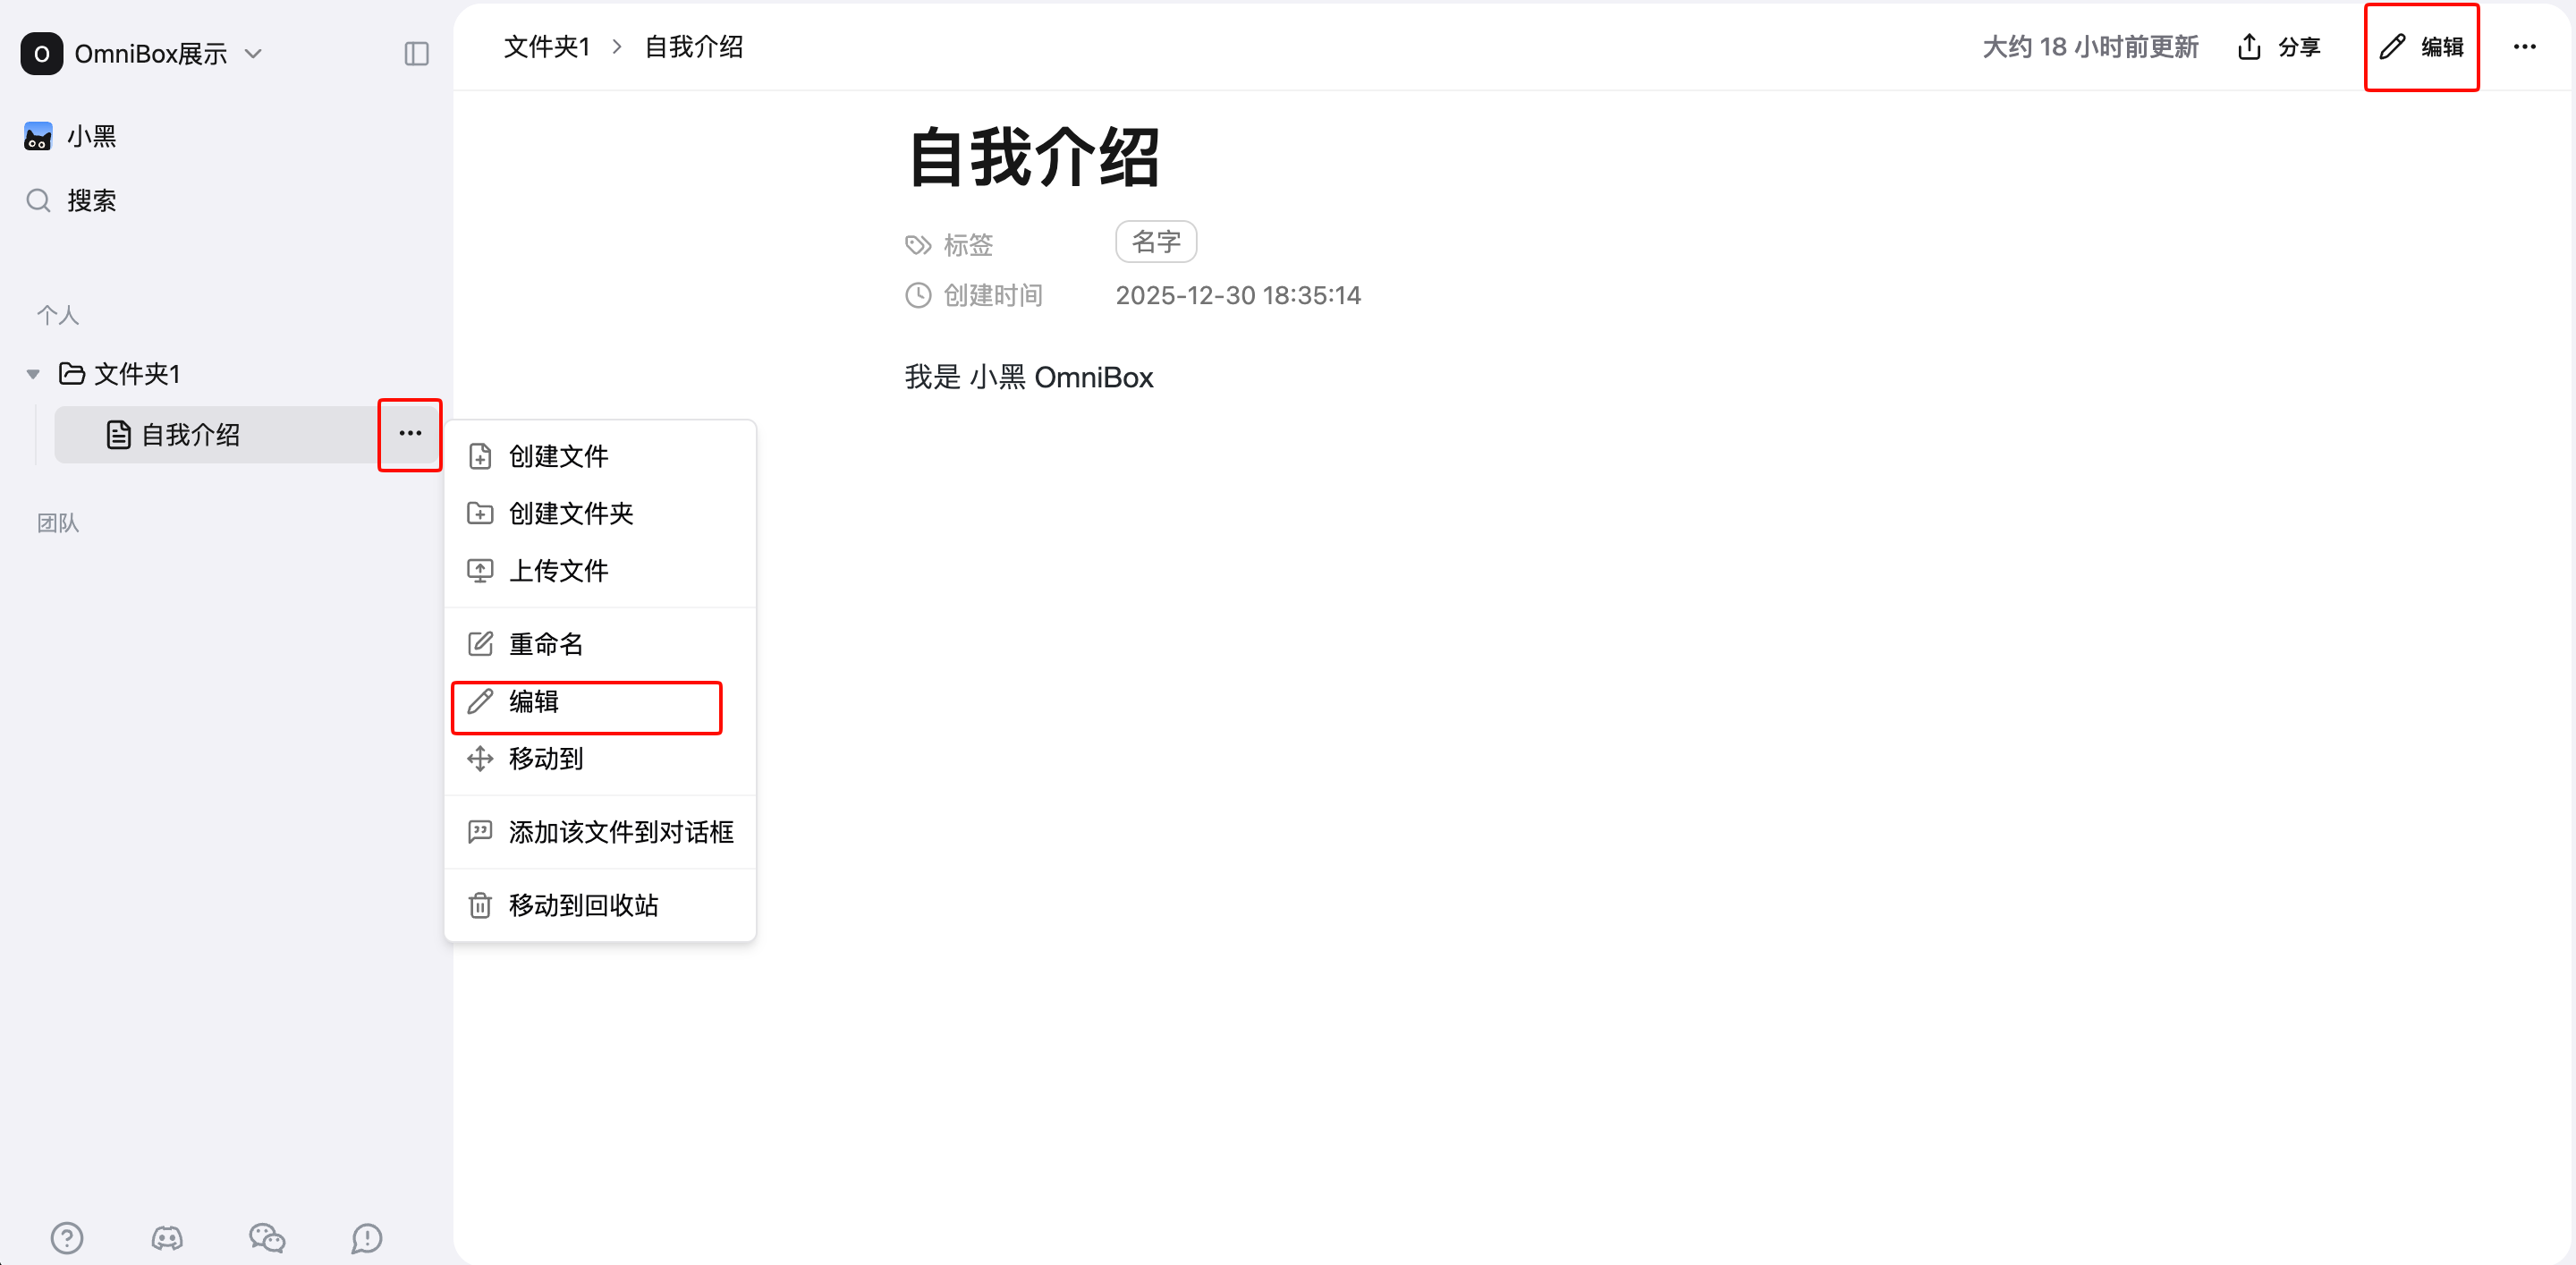
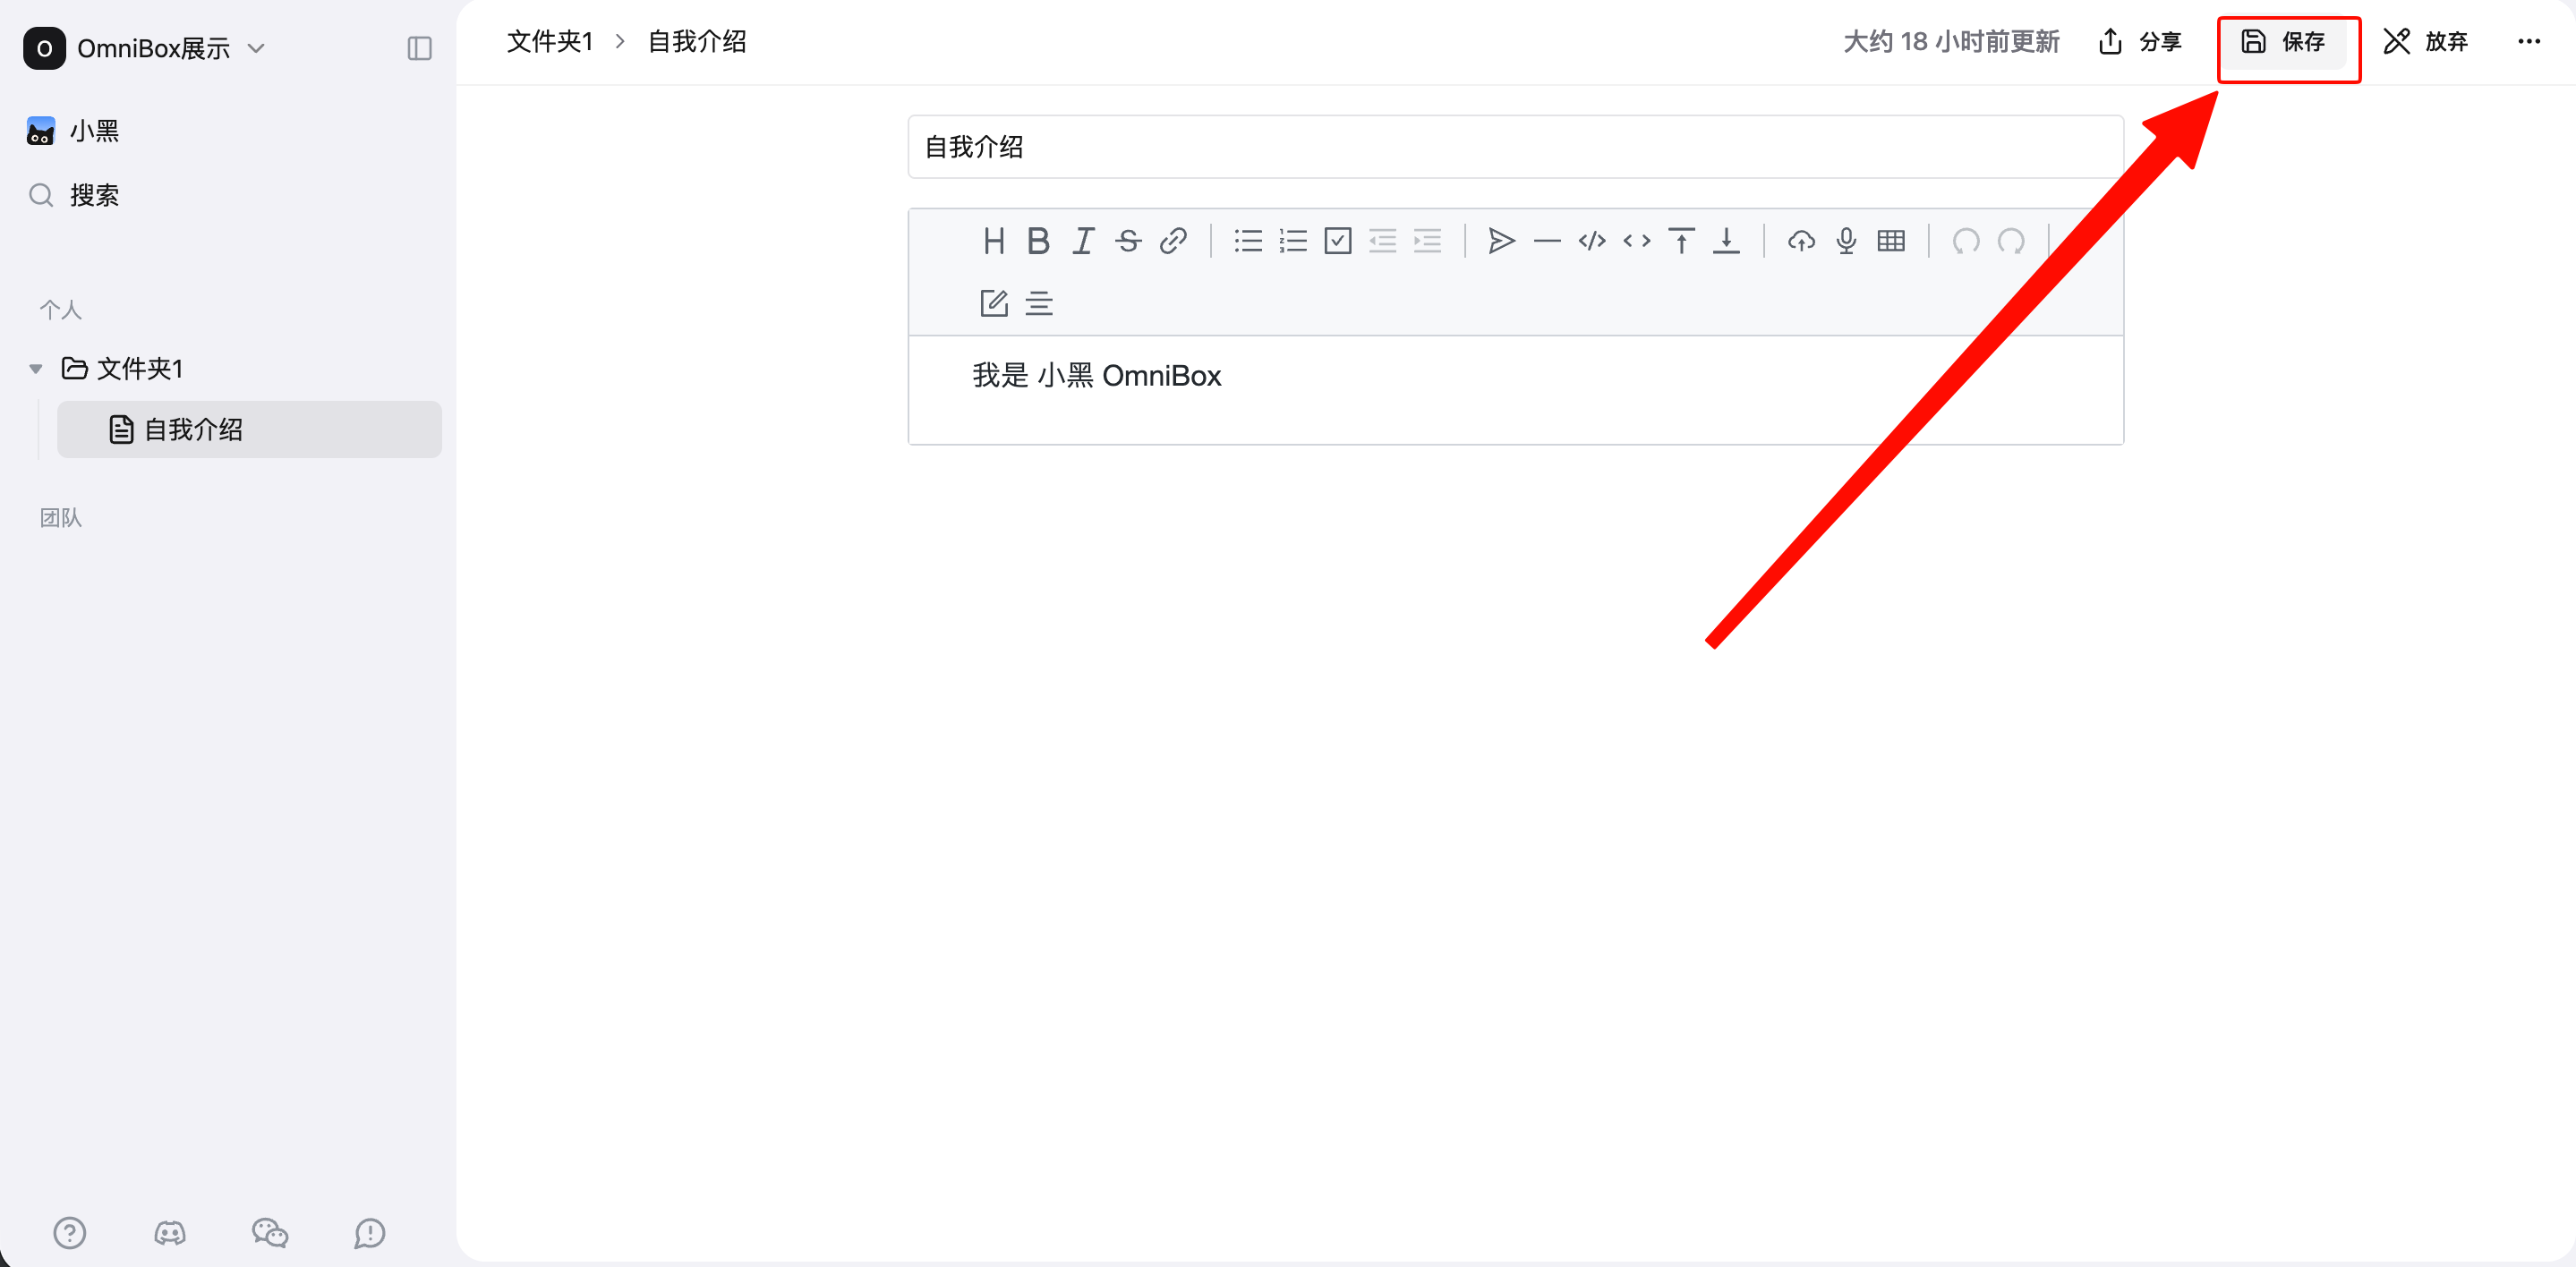
Editin a file menu to enter edit mode. ClickSaveto see the modified content - To continue editing a file, click the
Editbutton in the top right corner - For regular folders, clicking
Editopens a dialog where you can change the folder name. This matches theCreate Folderinteraction
To try the new editing experience, enable Editor 2.0 in Settings > New Features Preview. The new editor continues to improve document editing, title display, long-title handling, and Markdown Front Matter recognition and rendering in resource details.
Move Files/Folders
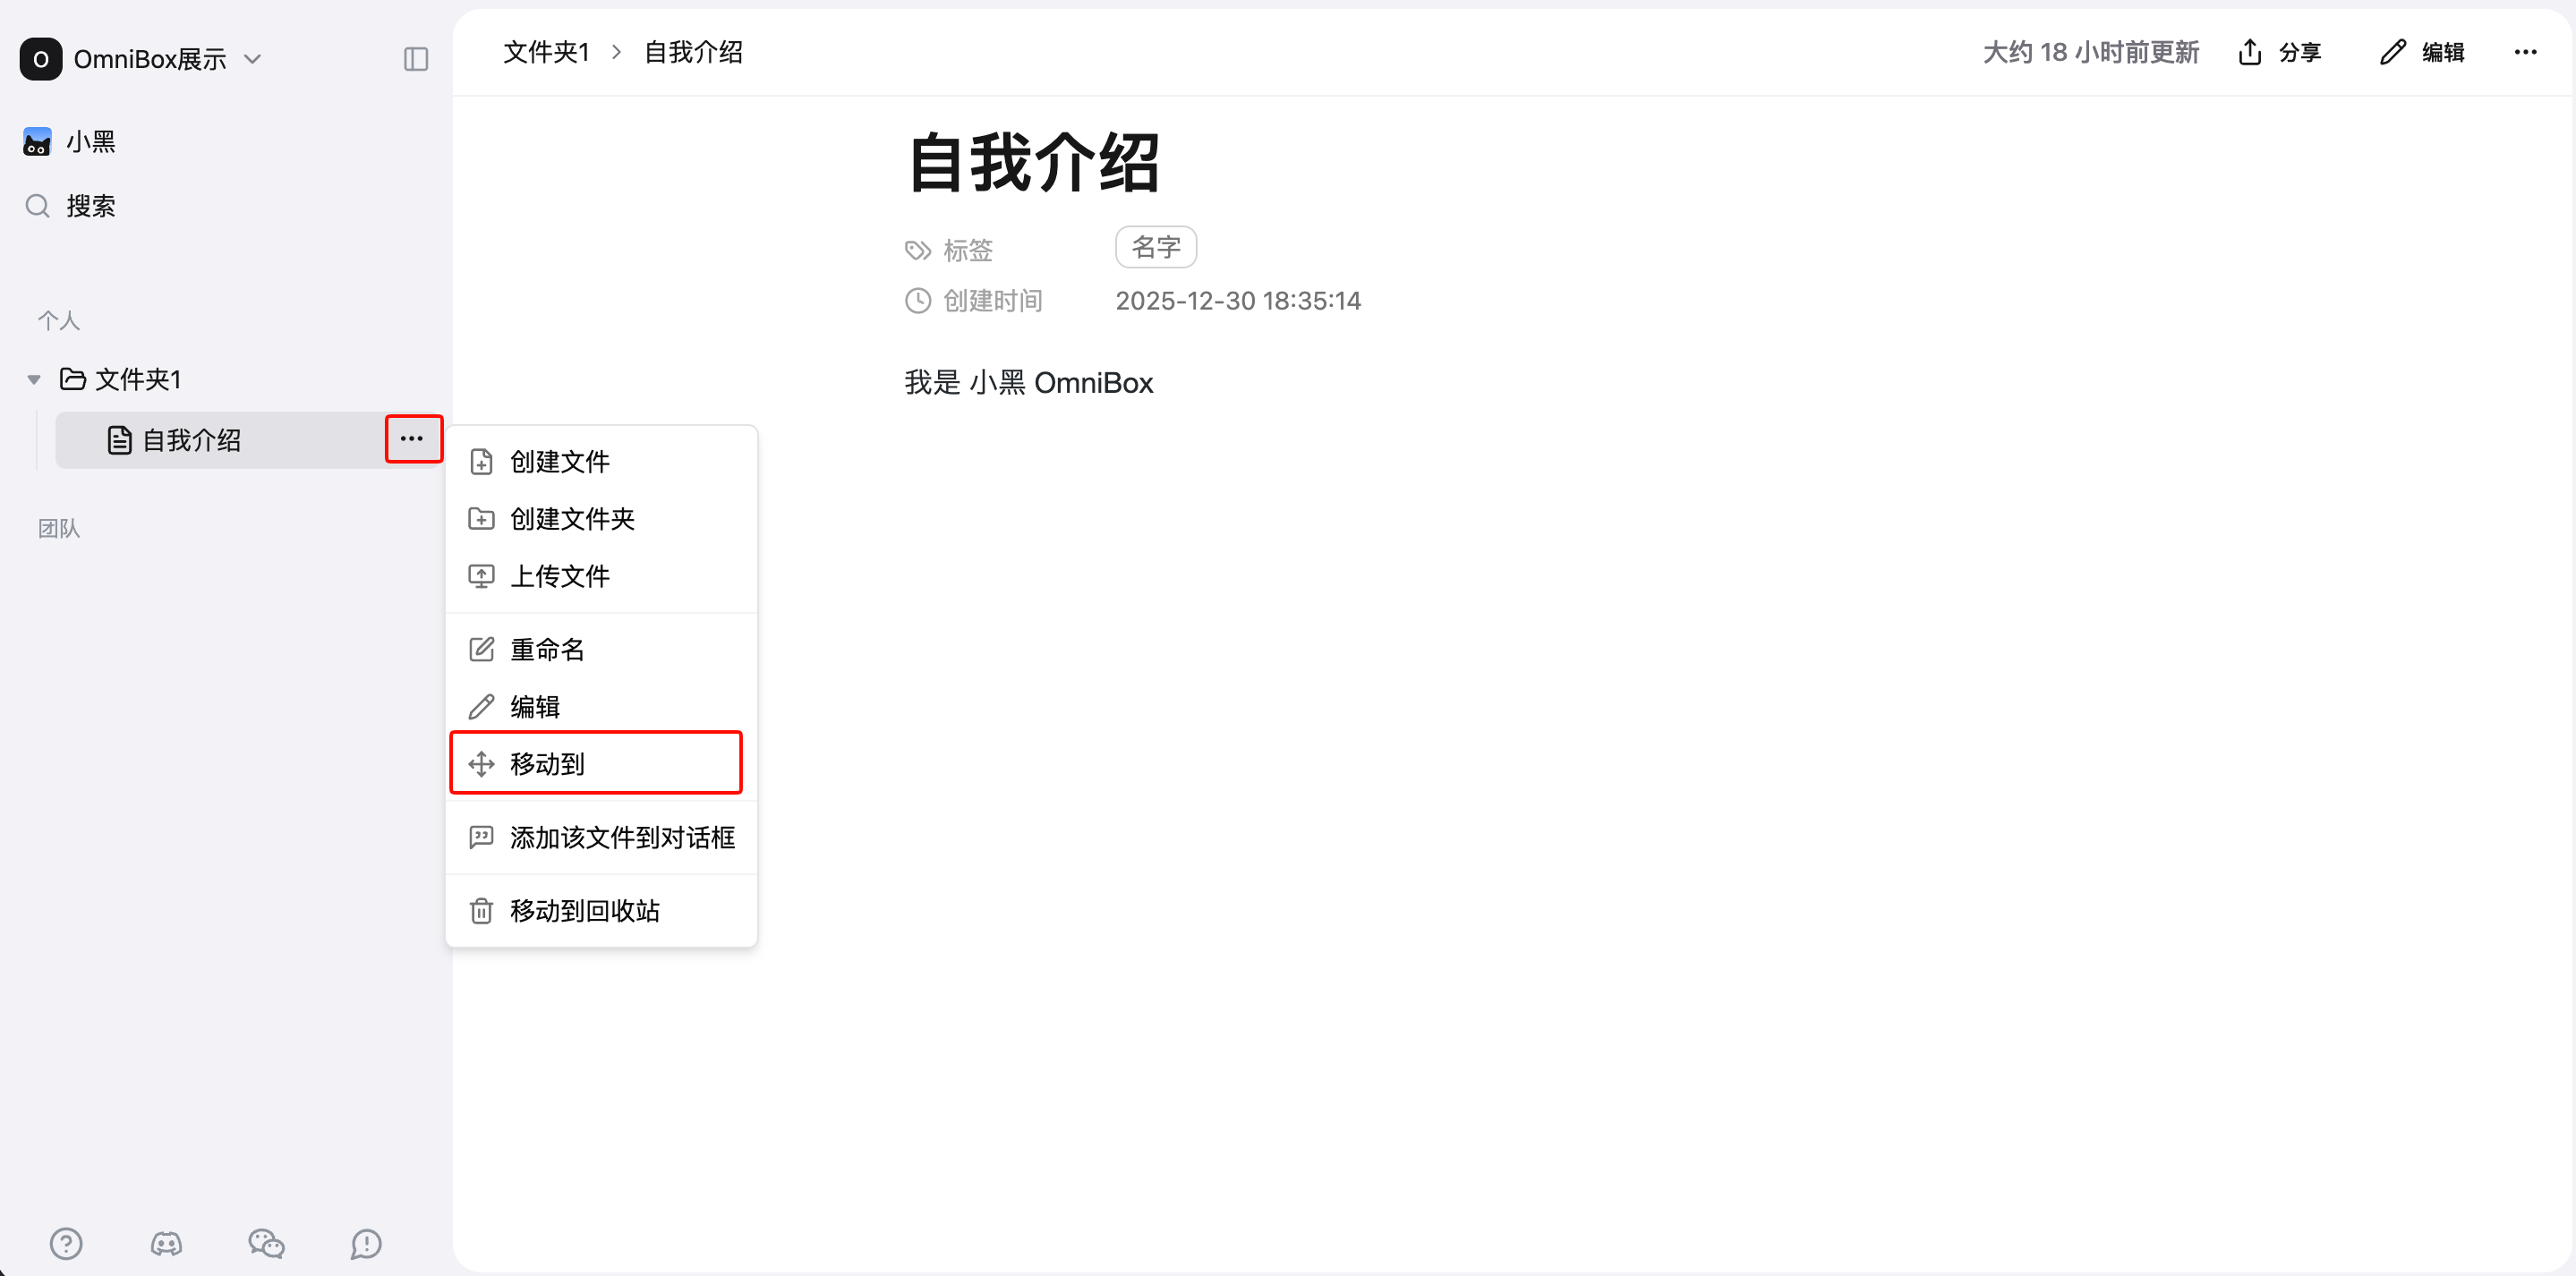
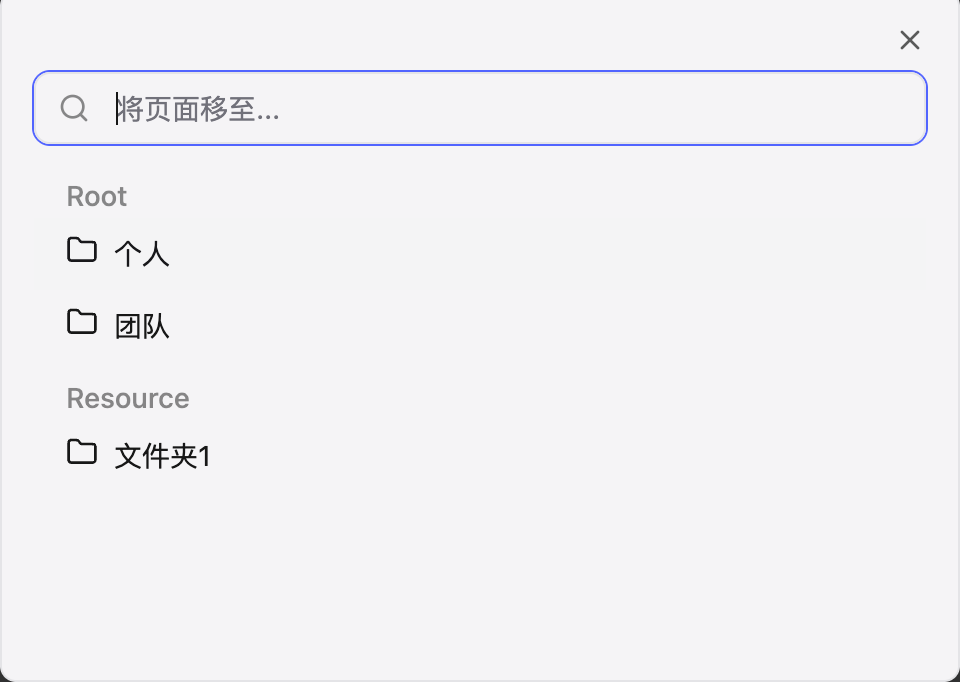
Click Move to in the menu, select the destination in the popup, and you can move the selected file/folder (including all files within the folder) to the specified location.
Copy and Download Files
Copy Content
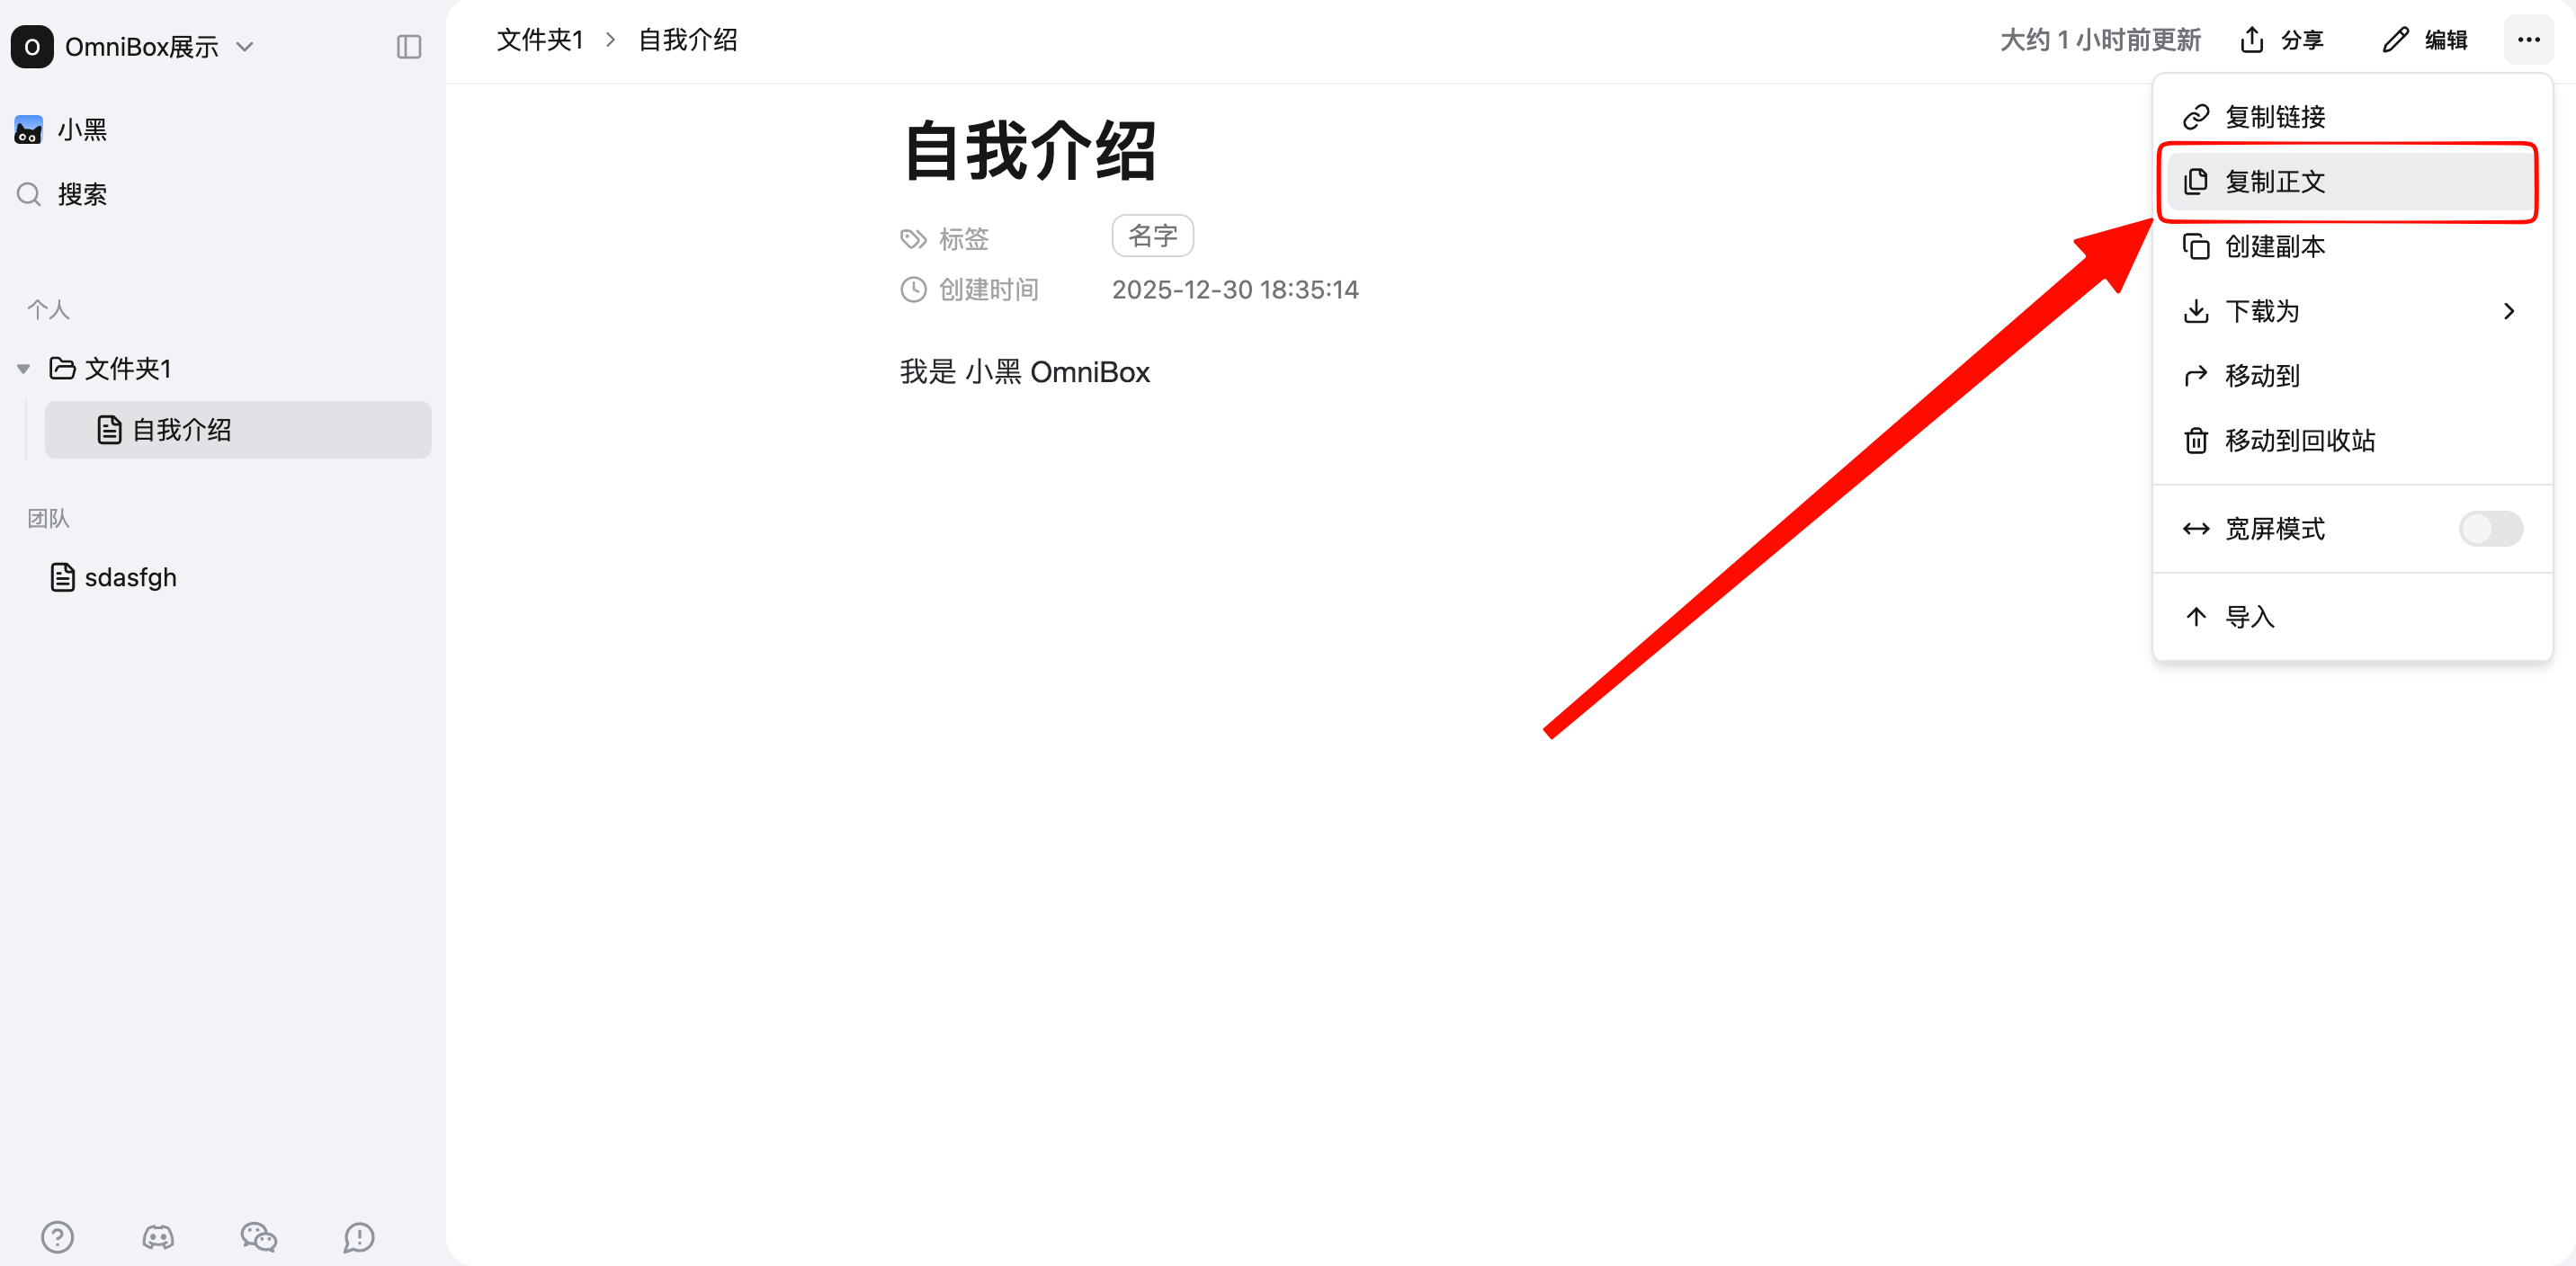
Open a file, click the menu in the top right corner, click Copy Content to copy the content to the clipboard.
Download Files
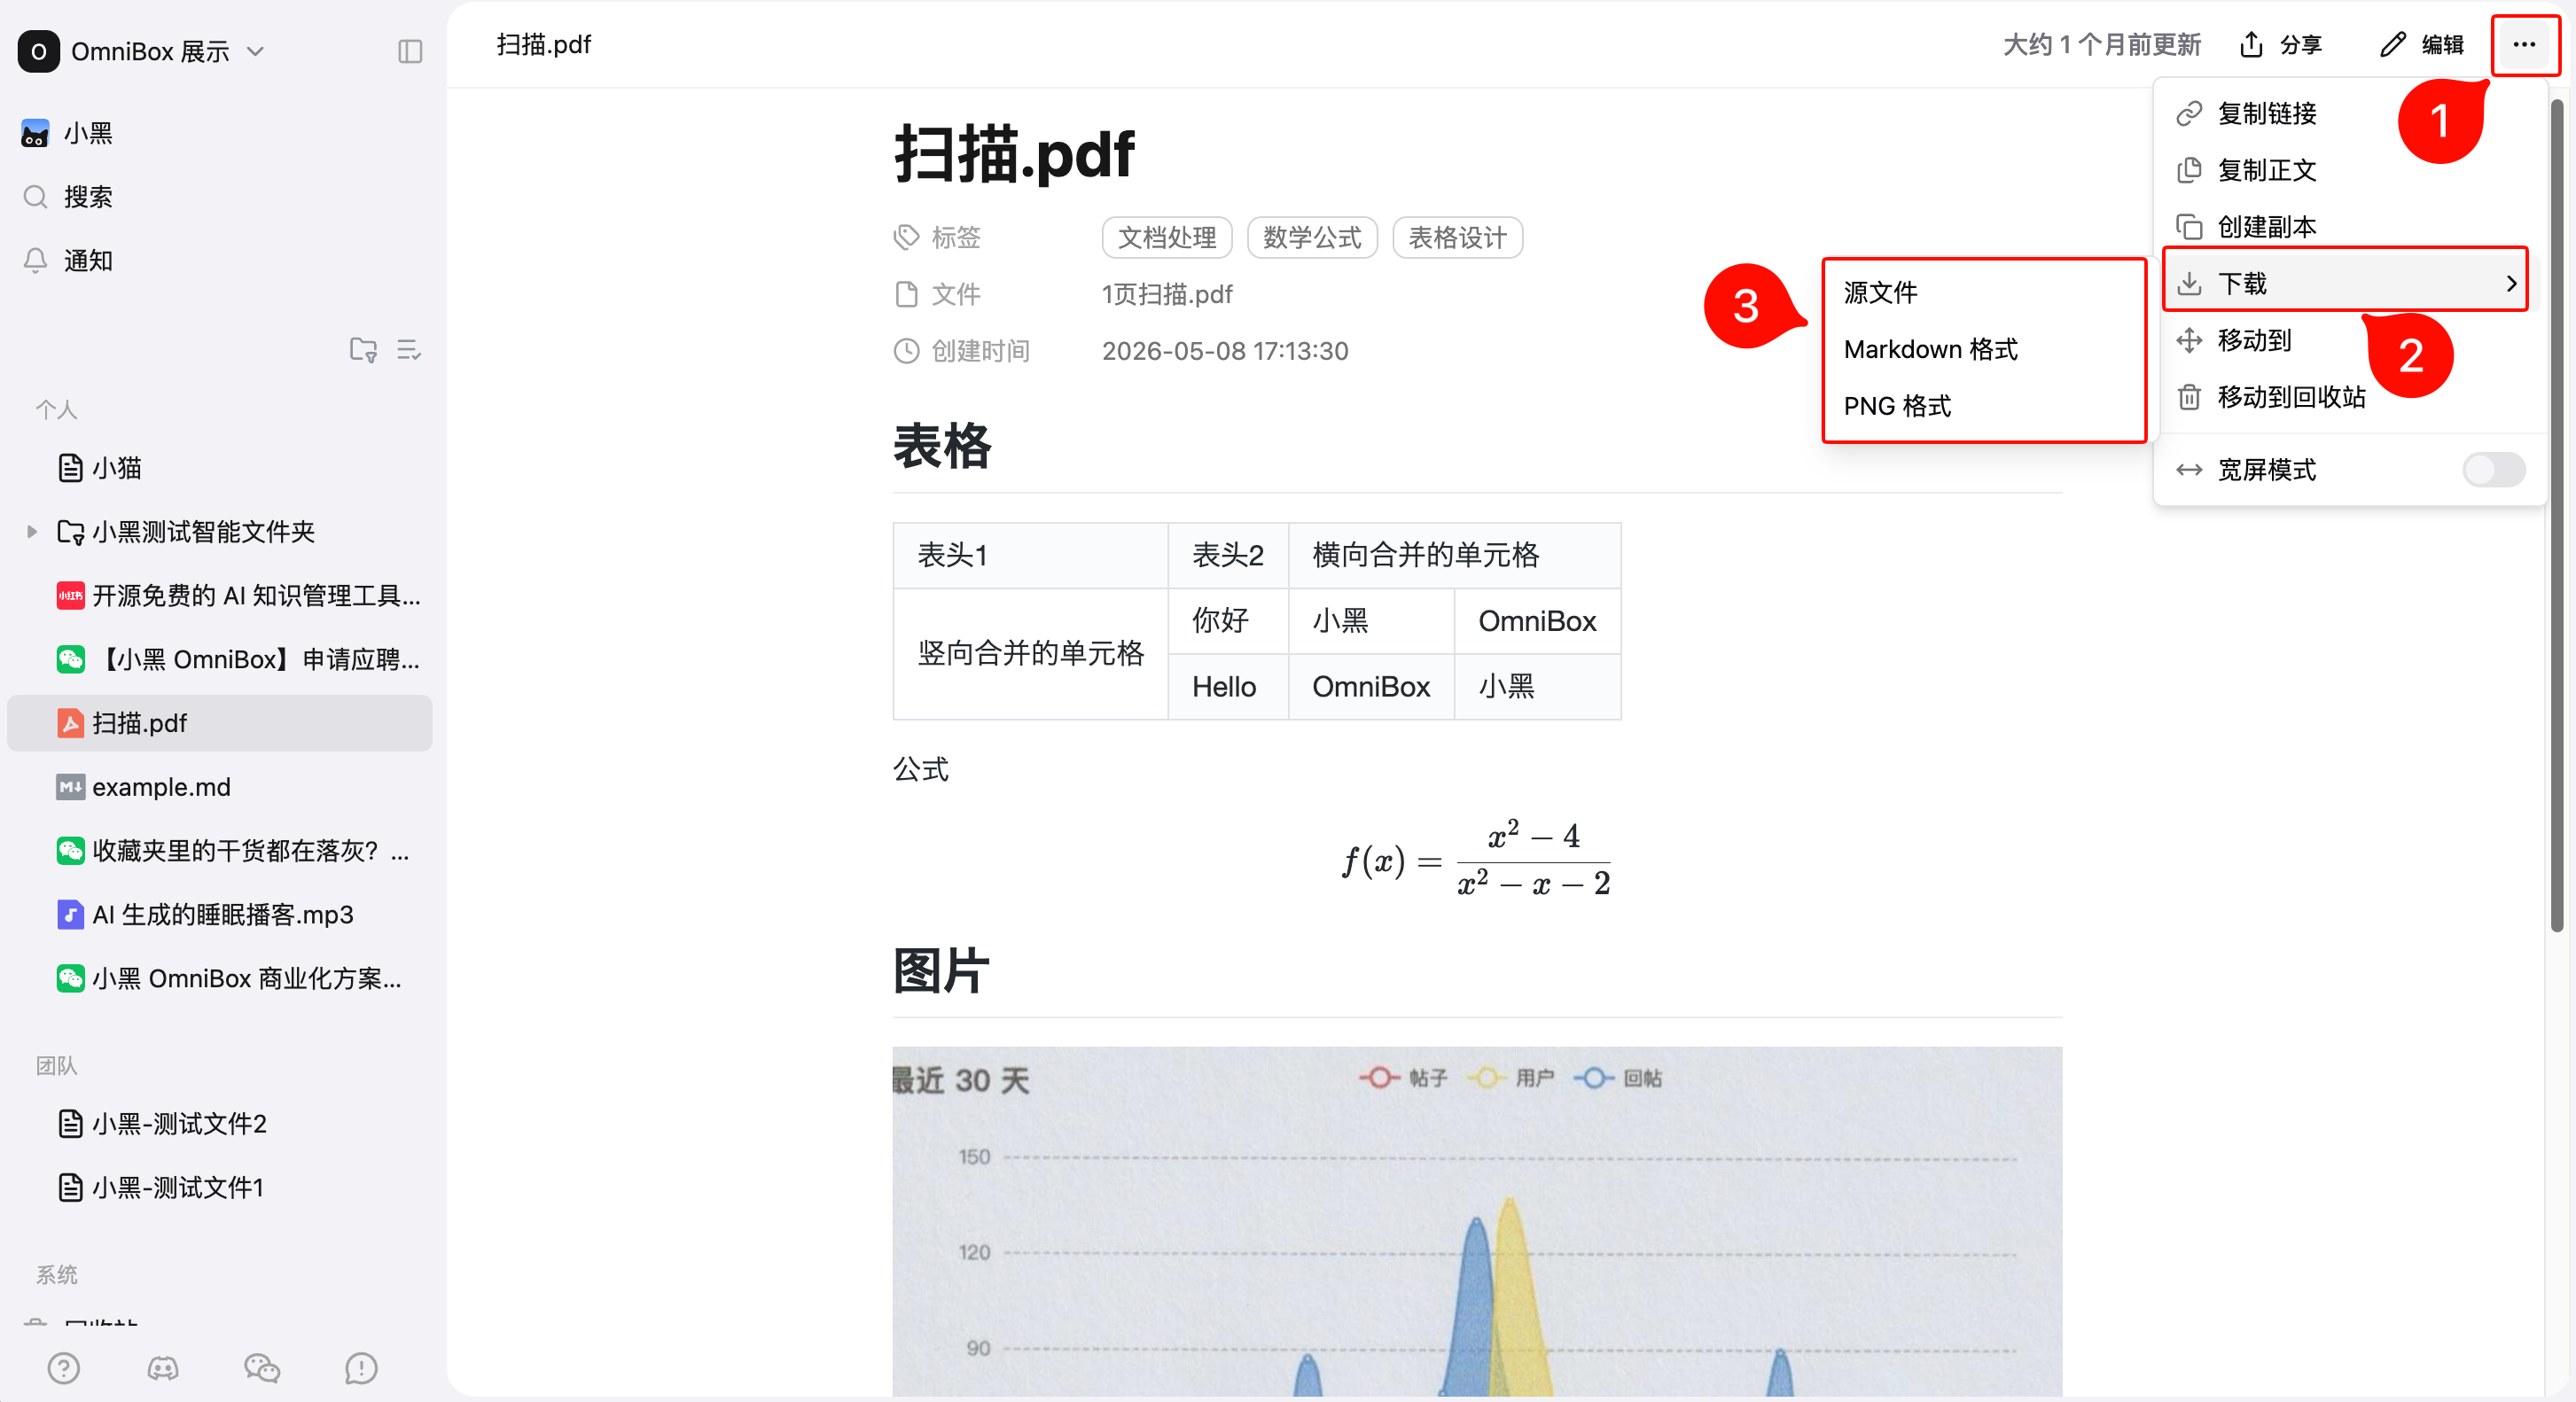
Open a file, click the menu in the top right corner, then click Download to choose a download option:
Source file: Download the original uploaded file. This option only appears for resources created from local file uploads.Markdown format: Download the current content as a Markdown file. If the content contains images, OmniBox packages the Markdown file and image attachments into a ZIP file.PNG format: Export the current document content as a PNG image for quick sharing or archiving.
Folders and smart folders cannot be downloaded as Markdown or PNG.
Files in edit mode cannot be downloaded.
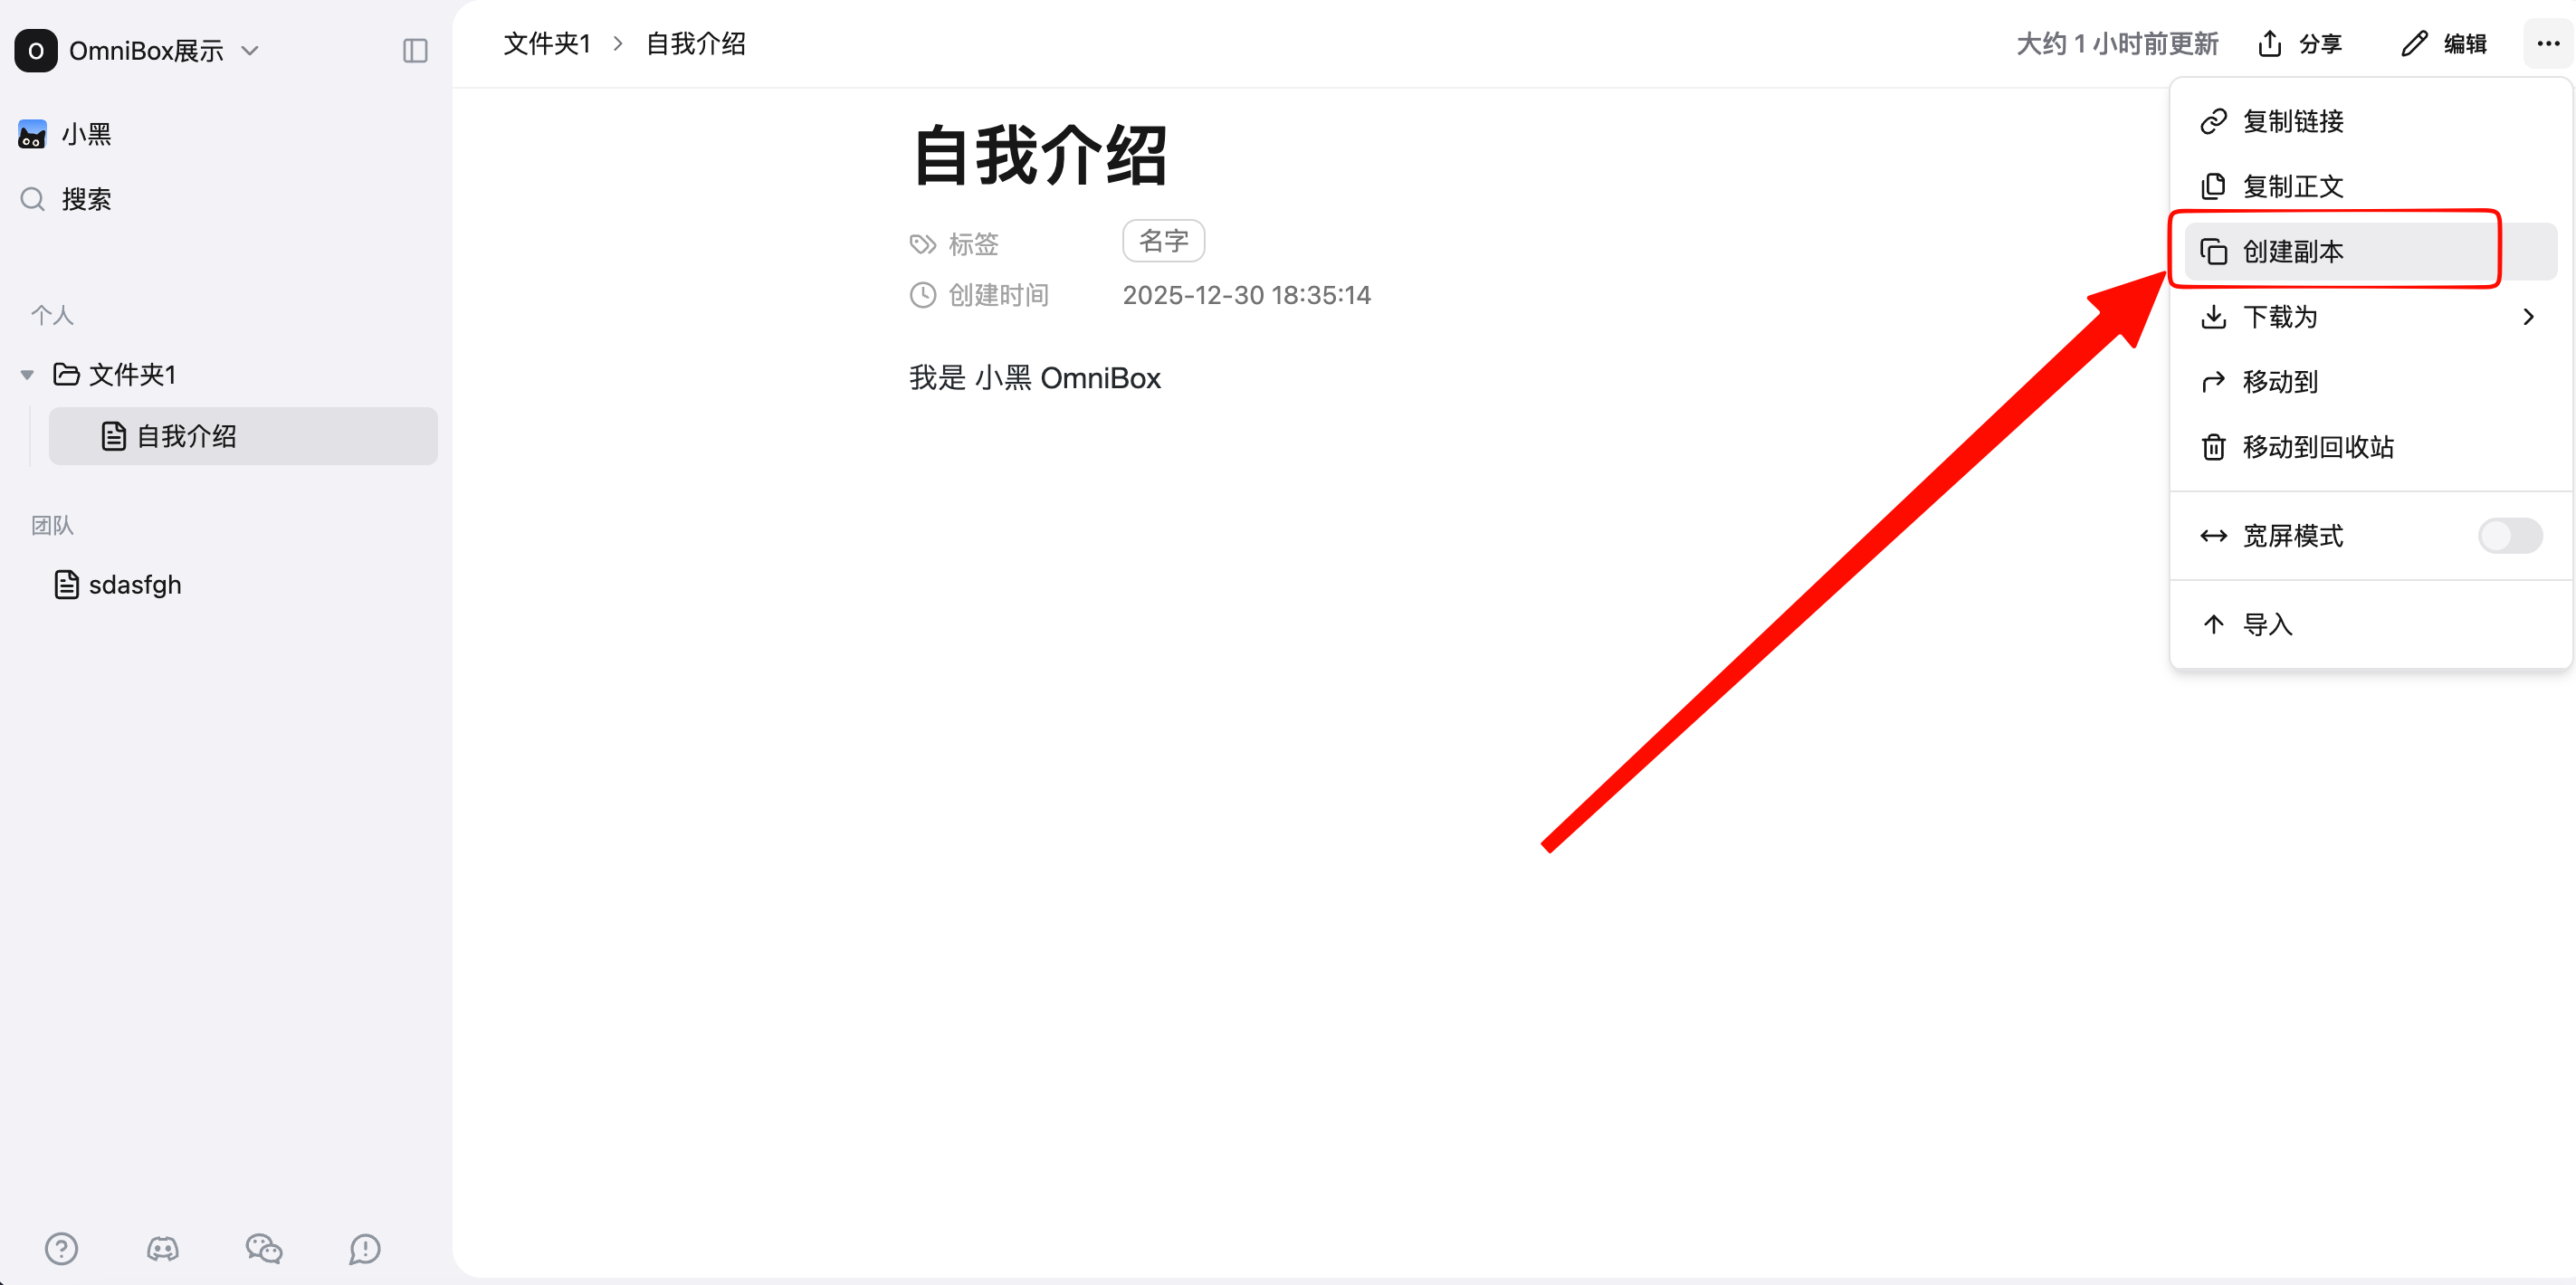
Create a Copy
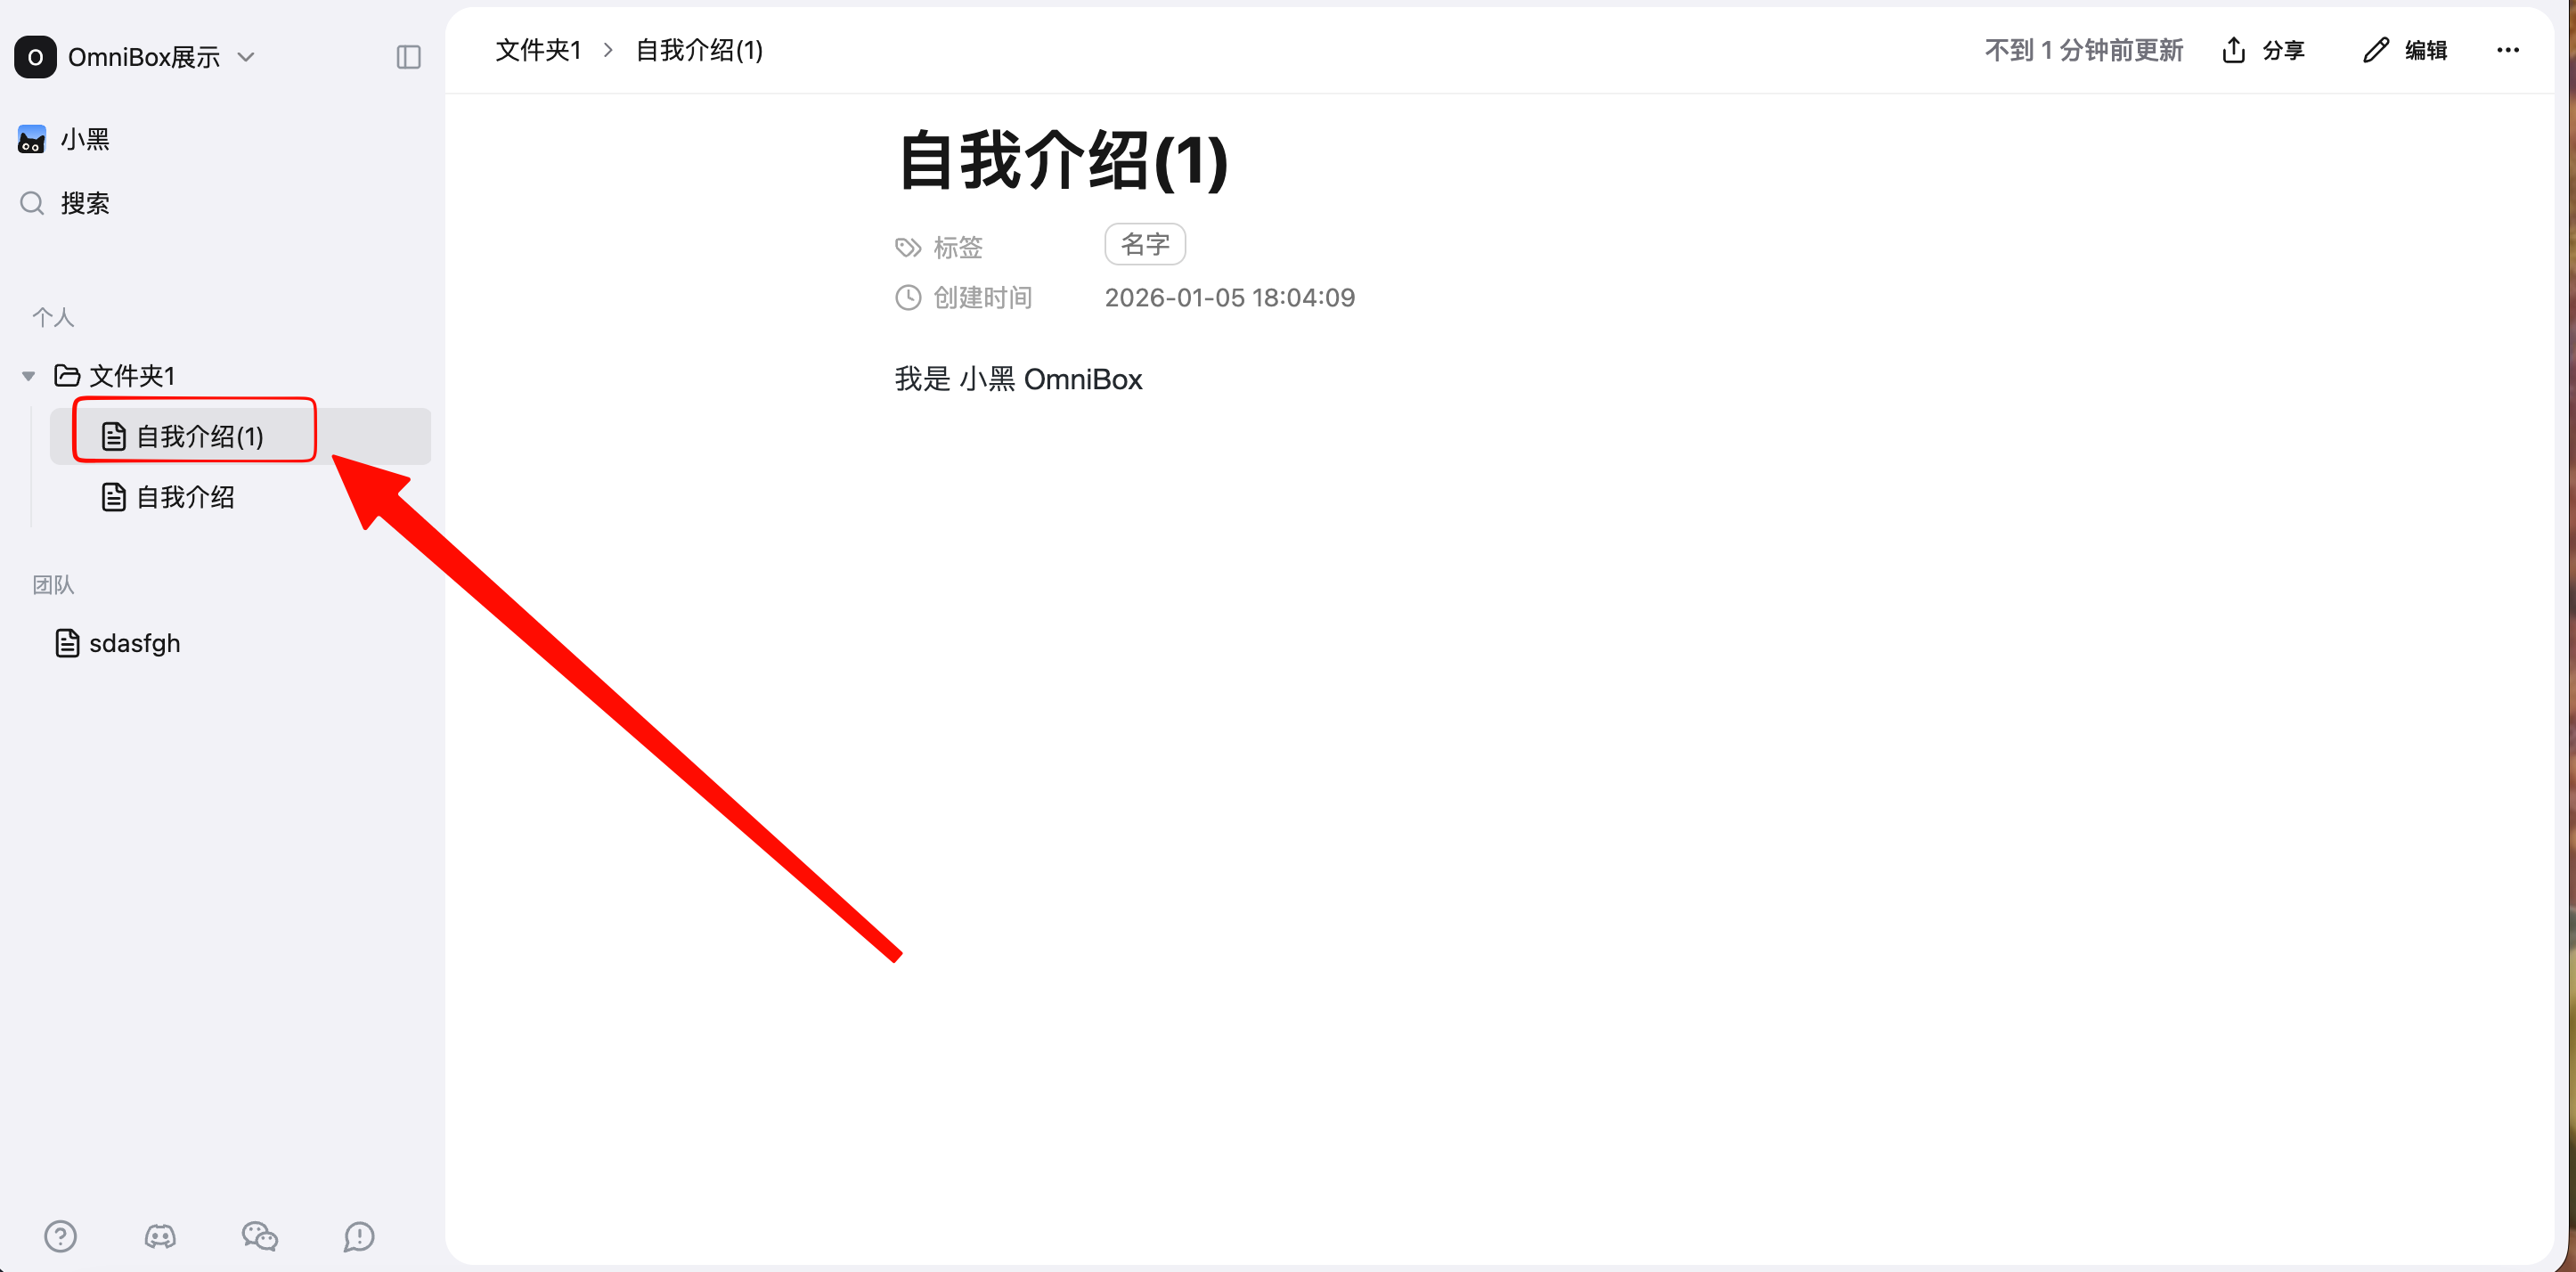
Open a file, click the menu in the top right corner, click Create a Copy to create a new file identical to the original in the knowledge base, named original filename(1).
Delete Files/Folders
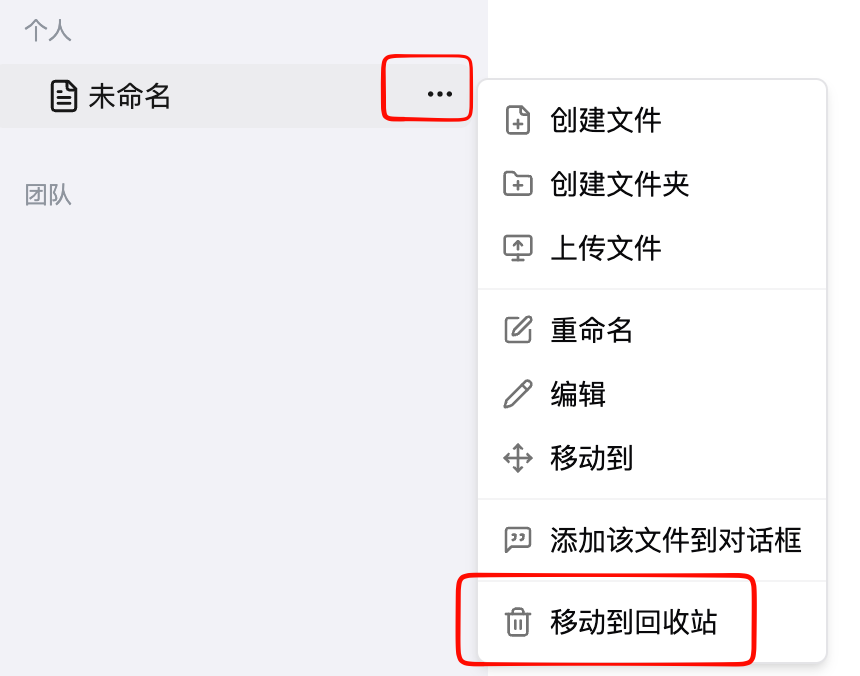
Move to Trash
- Click
Move to Trashin the menu to move the selected file/folder (including all files within the folder) to the trash.
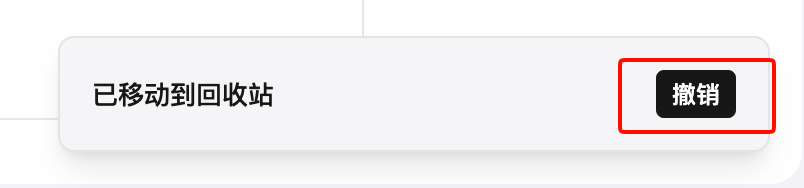
- If you accidentally triggered this, click
Undoin the bottom right corner to restore the file/folder (including all files within the folder) to its original location.
View Trash Contents
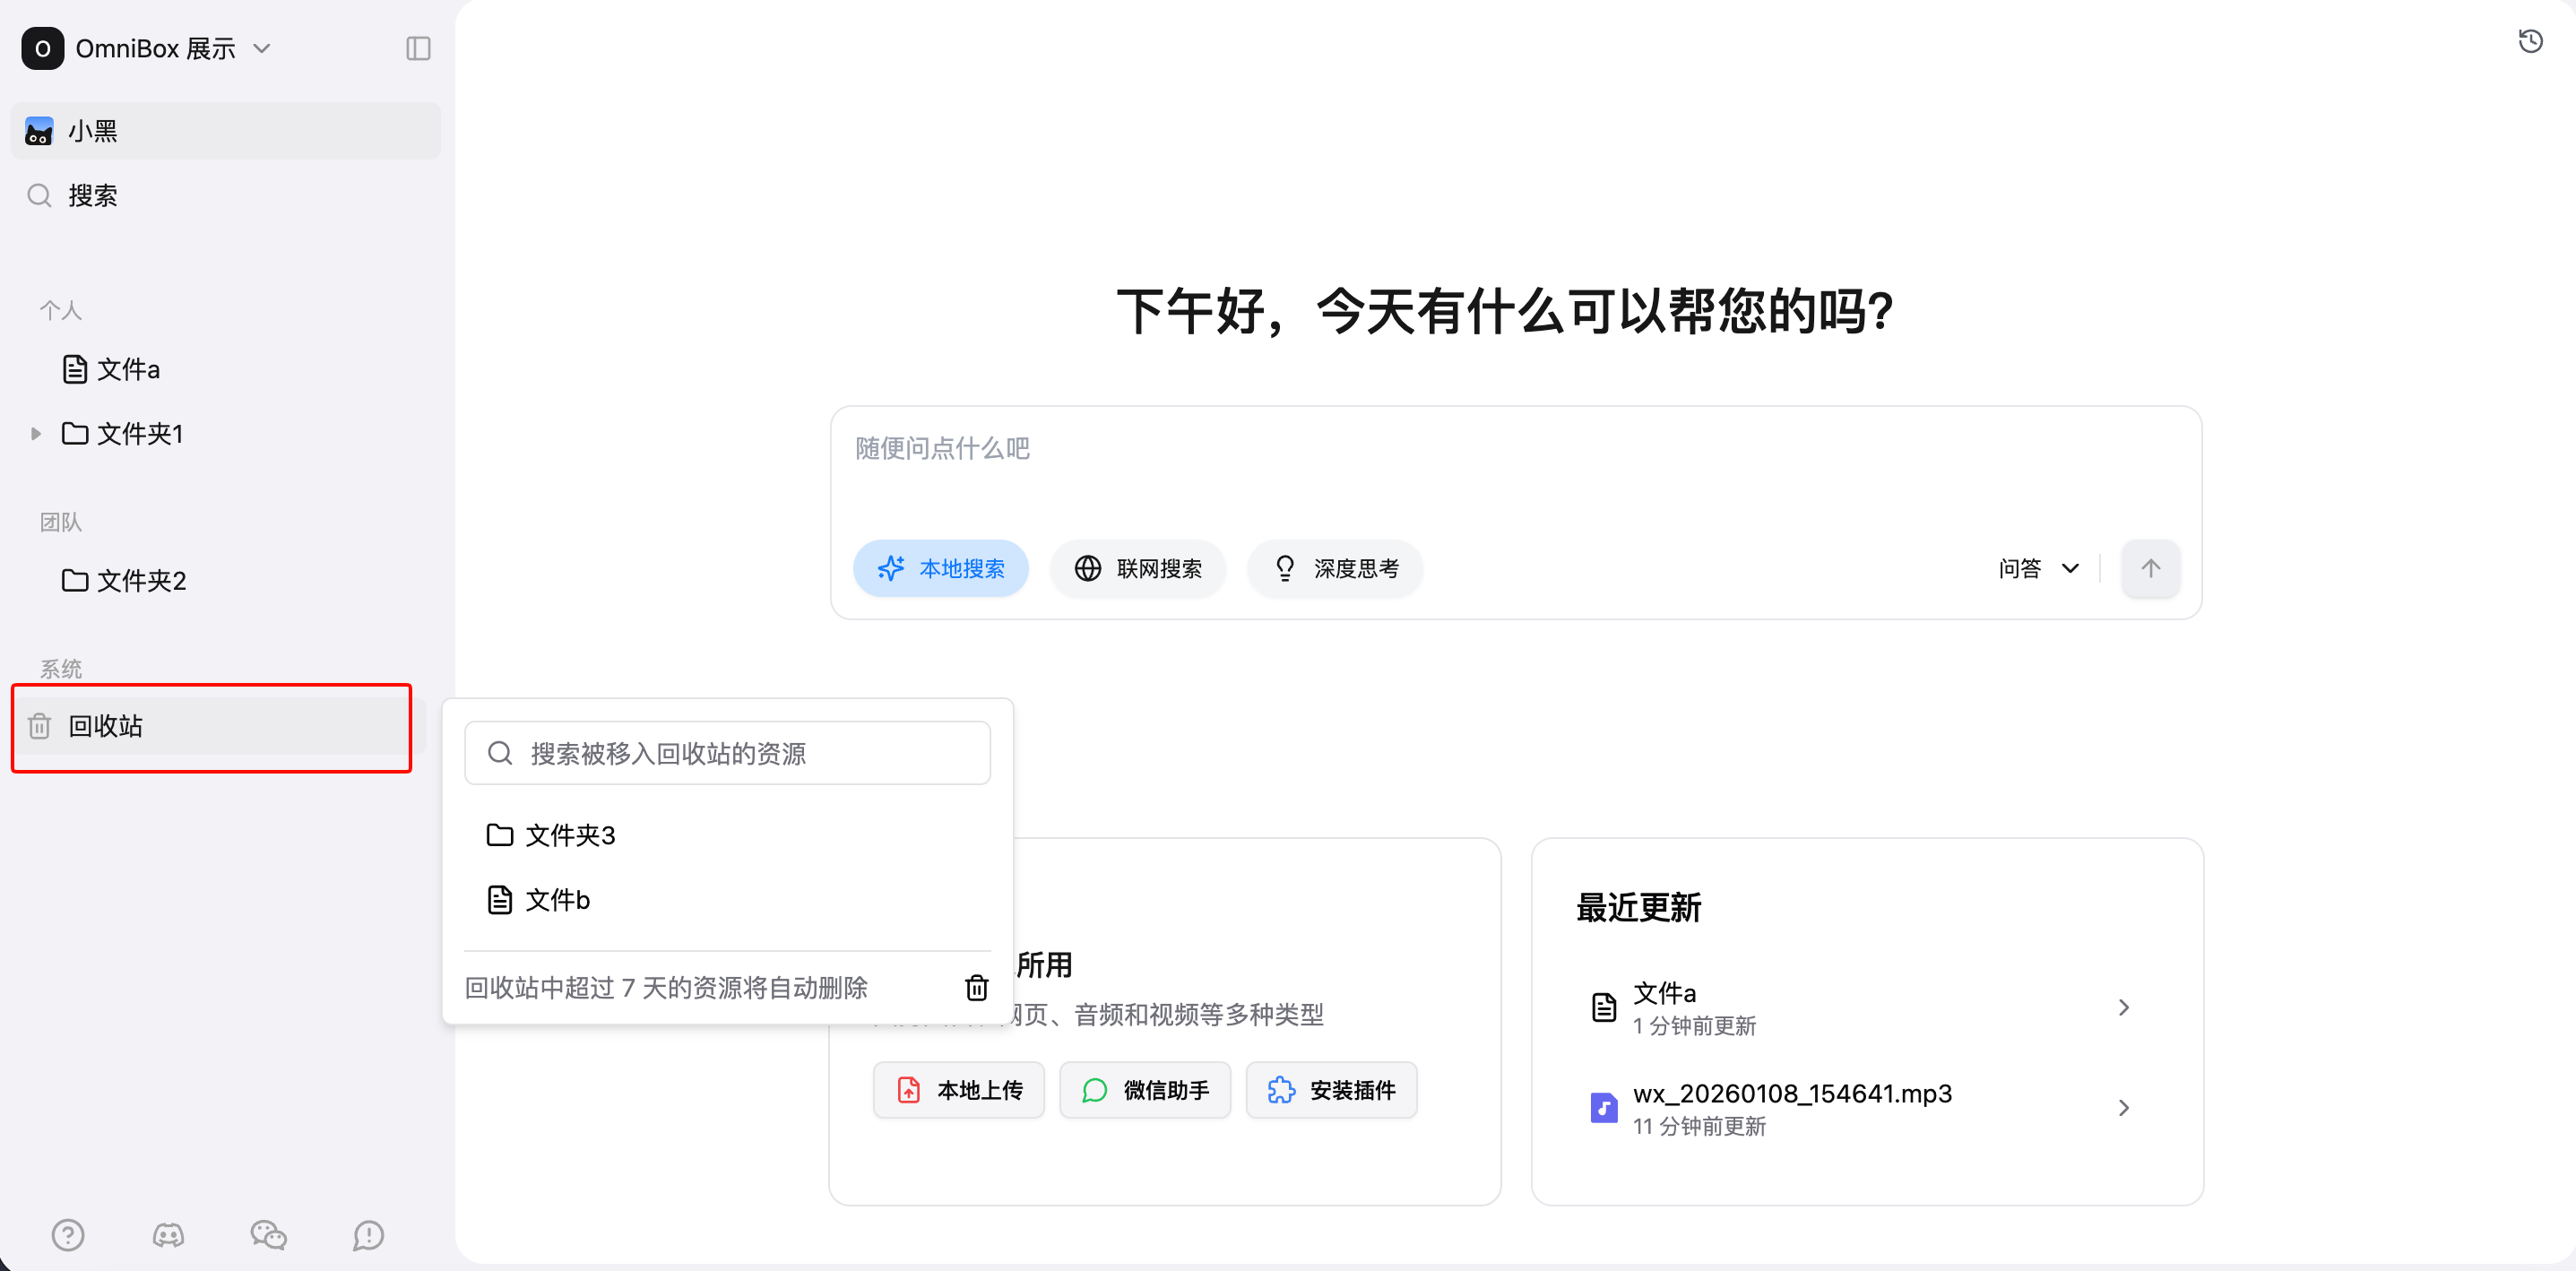
- Click
Trashto view all files/folders (including all files within the folders) that have been moved to the trash - Resources in trash are automatically deleted after the retention period of the current namespace. Basic namespaces keep trash for 7 days, and Pro namespaces keep trash for 30 days.
Search in Trash
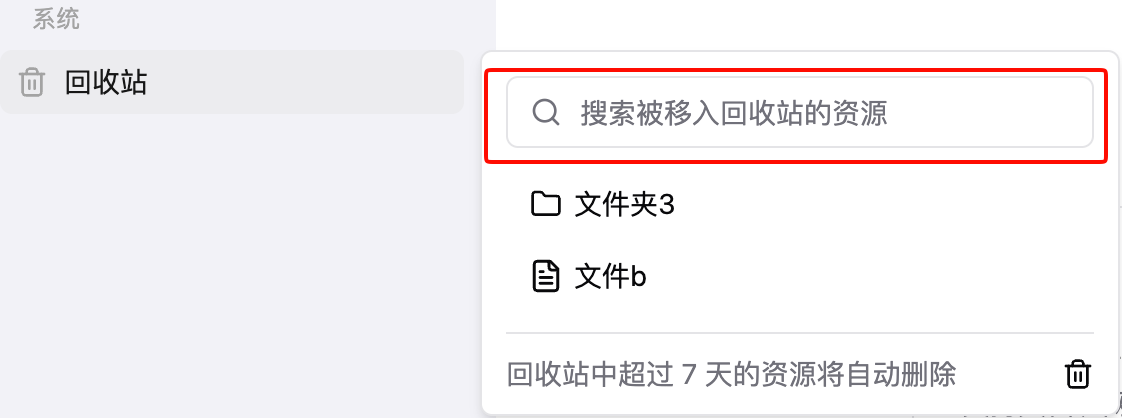
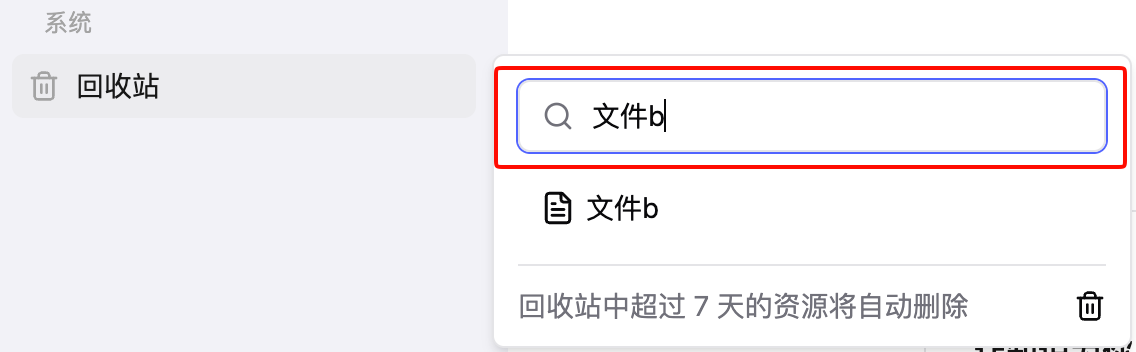
Click the search box and enter content to search for files/folders (including all files within the folders) that have been moved to the trash.
Manage Trash Items
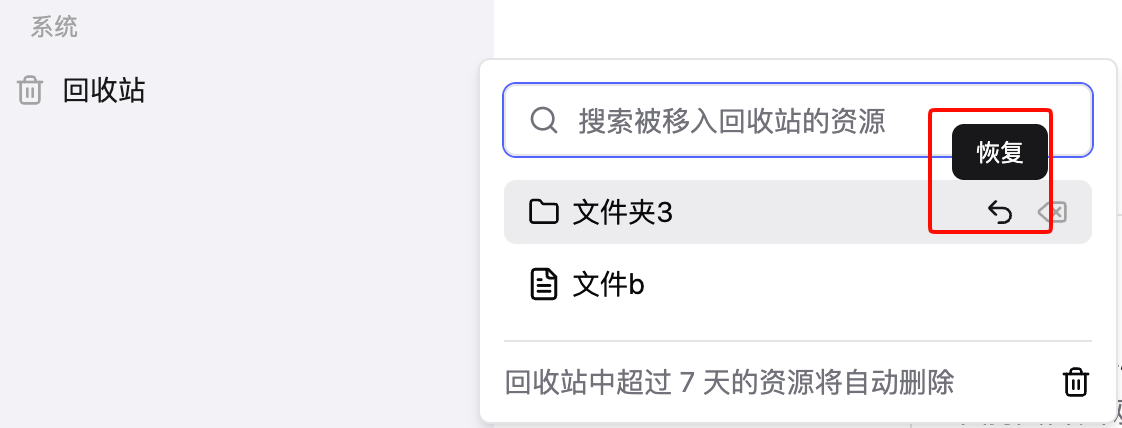
- Click
Restoreon the right side of a file/folder to restore the file/folder (including all files within the folder) to its original location.
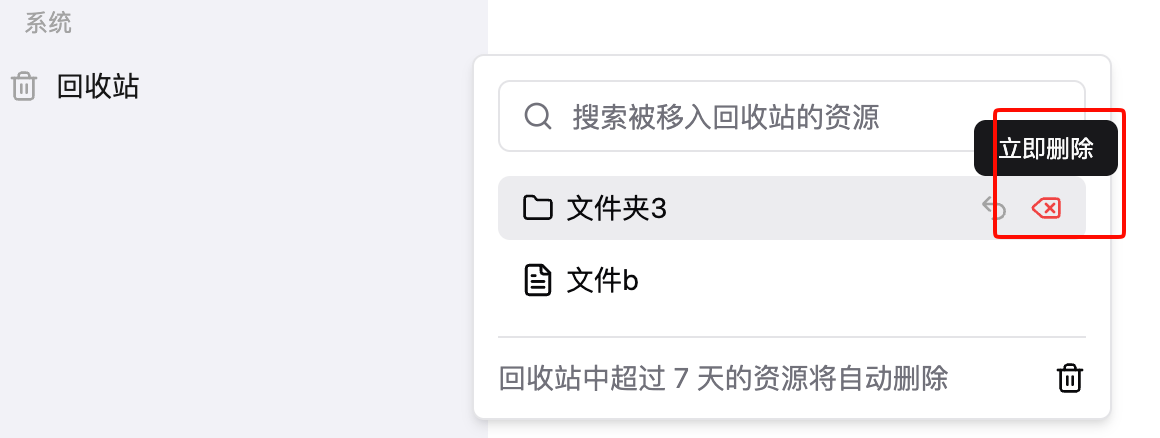
- Click
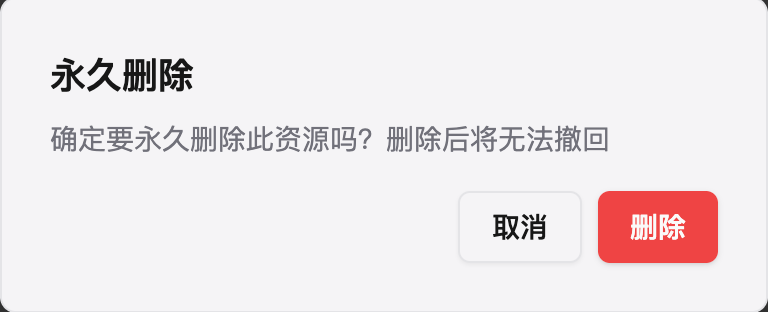
Delete Nowon the right side of a file/folder, and after confirmation, the file/folder (including all files within the folder) will be permanently deleted.
Note: This cannot be undone!
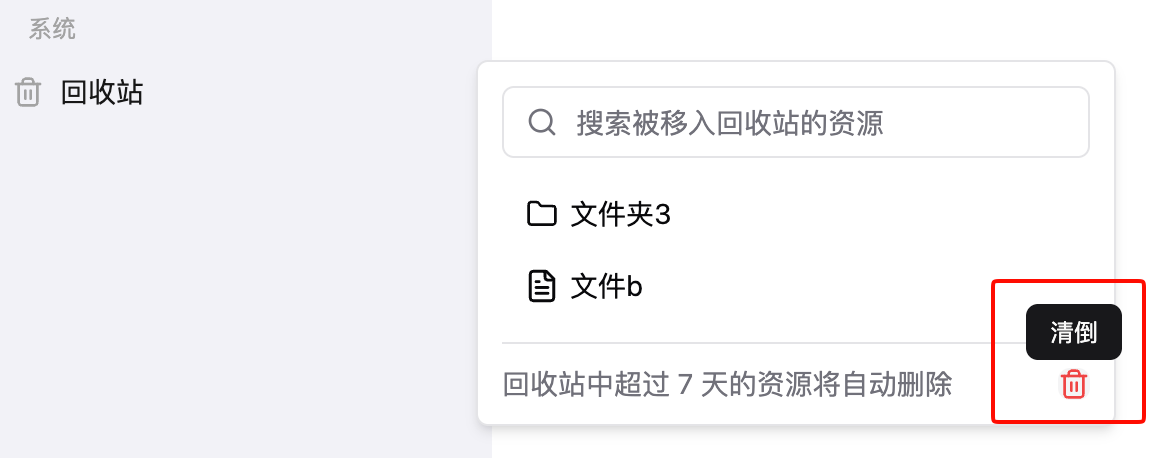
Empty Trash
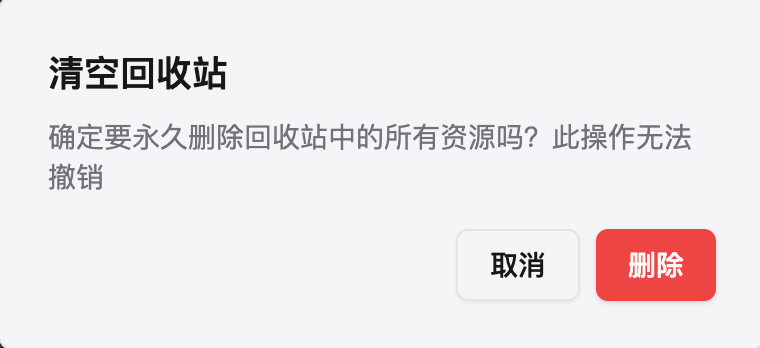
Click Empty in the bottom right corner, and after confirmation, all resources in the trash will be permanently deleted.
Note: This action cannot be undone!